

First let me apologize for there being so many pictures in this post. I’m pretty sure that I’m breaking some sacred blogging rule by posting so many pictures and I’ll probably be struck down by lighting as soon as I hit the publish button on this, but I felt like I needed the extra pictures here.
One reason is obviously to show you this homemade sushi, because that’s what we do as bloggers, we show off our awesome food photos. (Ok well, I don’t know how awesome my sushi photo really is, but I think it’s pretty good, so there you have it)
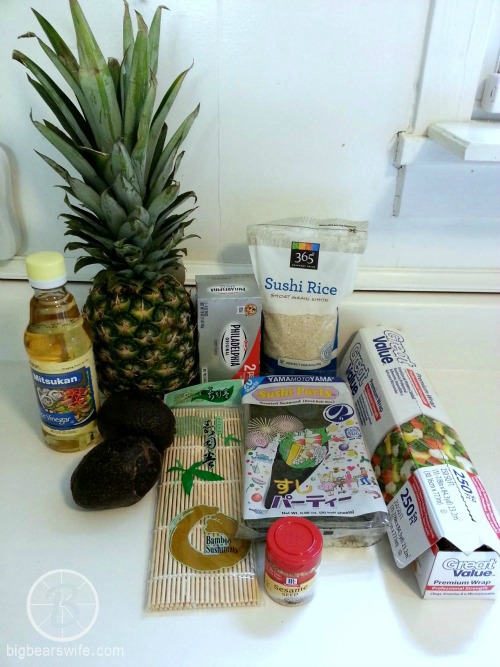
Second, I felt like I needed to show you some of the things I used to make the sushi. Like the Rice Vinegar, the nori, and the sushi rice. I’m sure there are tons of people out there that already know what these things look like, but if you’re like me you might not, and you might be standing in the middle of the grocery store trying to Google “Rice Vinegar” and fighting with your internet to load, while standing in the middle of the Asia section like a lost puppy.
That could be you (because it was certainly me) so I figured I’d just show you what I use and then if you need a visual, then you have it. If you don’t need it…then go on with your cool self 😉
Along with making some pretty ridiculous yummy sushi, another pretty cool thing happened last night. Big Bear ate sushi. As in he chewed it, swallowed it, and LIKED it. He’s never been into sushi, he’s never liked the idea! About a year ago or so I got him to like the “sushi” with the rice rectangle with the butterflied shrimp on top. But that was it! Now we’re moving up! Progress, I tell ya!
Although he ate that, he refused to taste anything else. Then we went to Disney and I suppose it was the whole “food blogger” atmosphere that helped me get him to try the Luna Sushi at Kona Cafe. He said it was “OK”. And then last night… I was making it for my brother and I, and he stole a piece…. and then another…. and then another. Before I knew it he had eaten a whole roll and loved it. He even took the left overs to work for lunch!
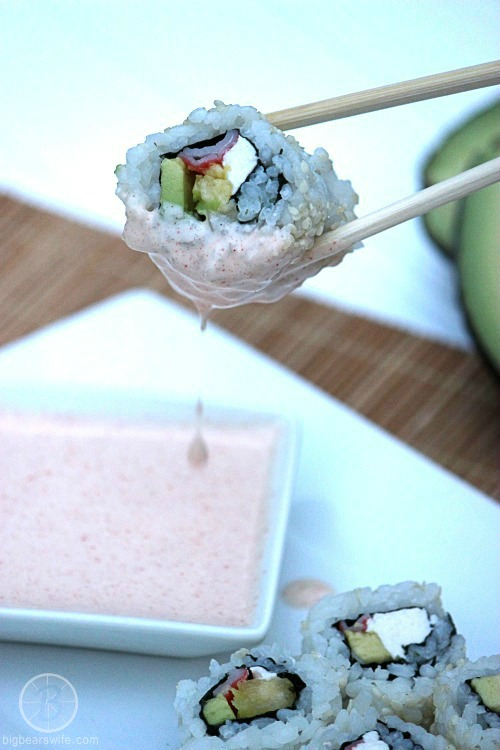
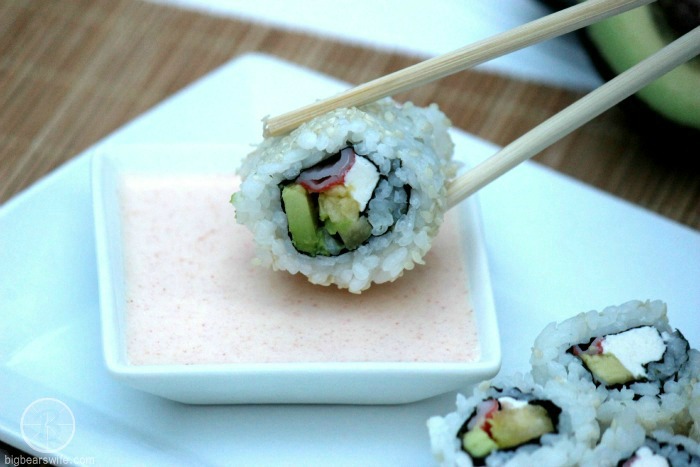
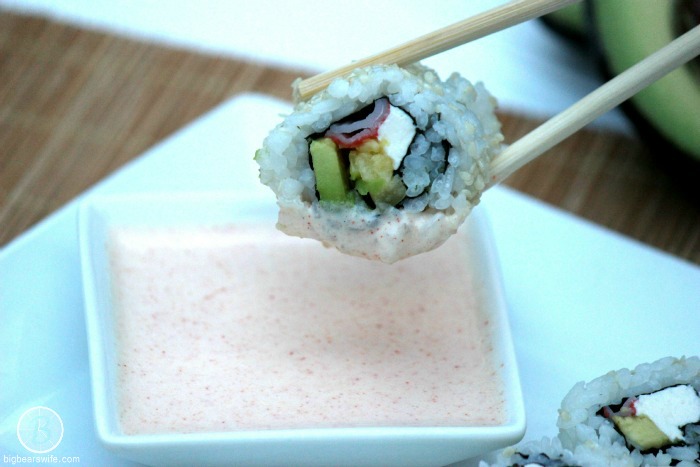
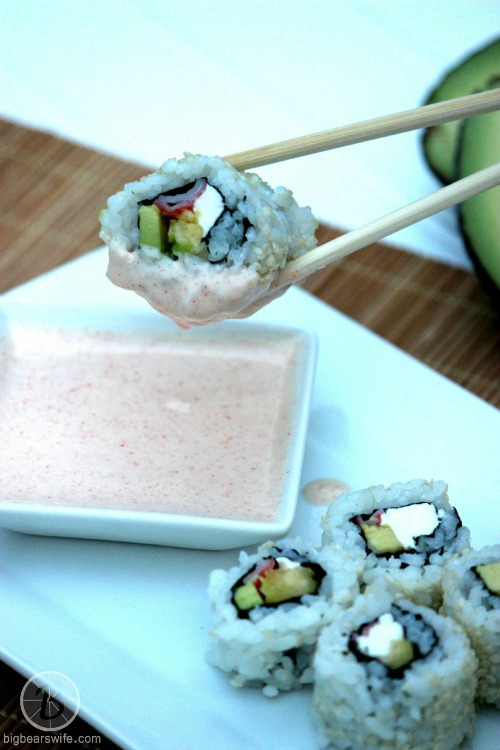
Question: What do you eat with your sushi? White Sauce or Soy Sauce? Or do you eat it plain?
I’m all for white sauce, but no “white sauce” for BigBear. Haha, he is anti-mayo so he didn’t have any of the homemade “Japanese white sauce”. But that’s ok, because my brother and I love it, so we didn’t want to share anyways.
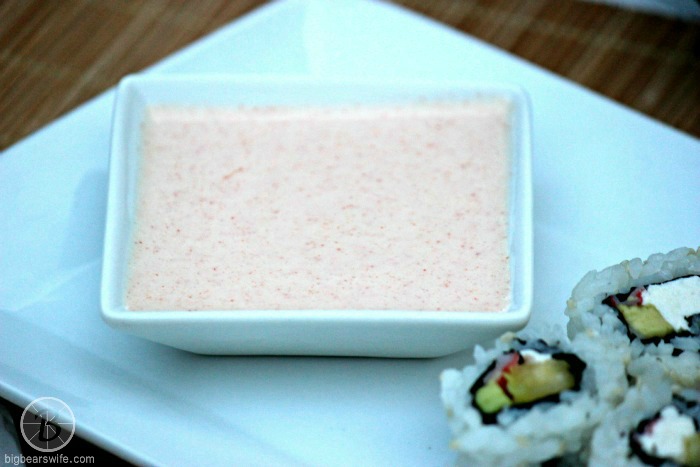
I started making my own “Japanese white sauce“ a few years ago to go along with homemade Japanese food and now it’s the only kind my brother will eat. Whenever he gets to-go sushi, he gets my mom to grab the recipe from my blog so he can have “the good Japanese white sauce”. haha.
I use to be intimated by homemade sushi, but after making it a few times, it’s becoming pretty easy. It just takes a little practice and a little prep work. I probably won’t ever make sushi for myself alone for a dinner because of all of the prep…. I’m kind of lazy when it comes to cooking for one, but I don’t mind making it when BigBear and my brother are around!
These are some of the things that you’ll need to make this Homemade Sushi:
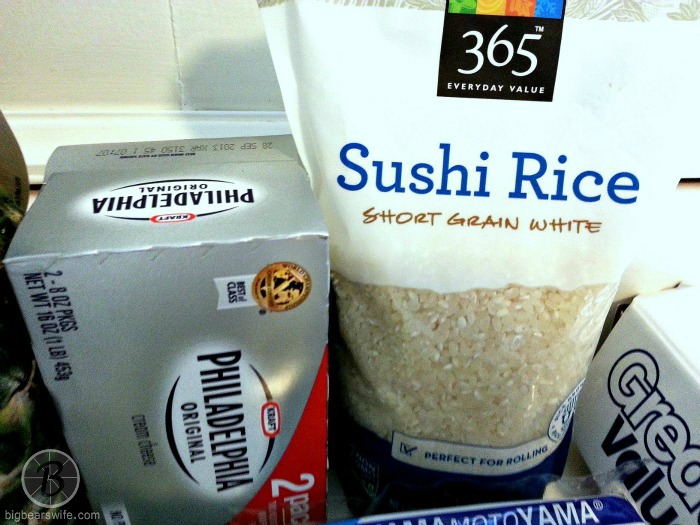
Sushi Rice
Toasted Seaweed
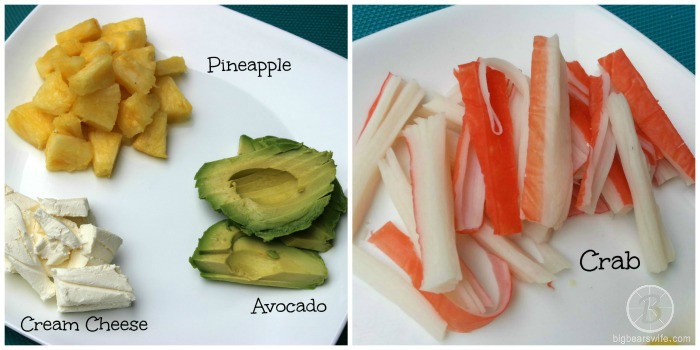
Cream Cheese
Avocado
Pineapple
Crab Meat or Imitation Crab (not pictured*oops sorry)
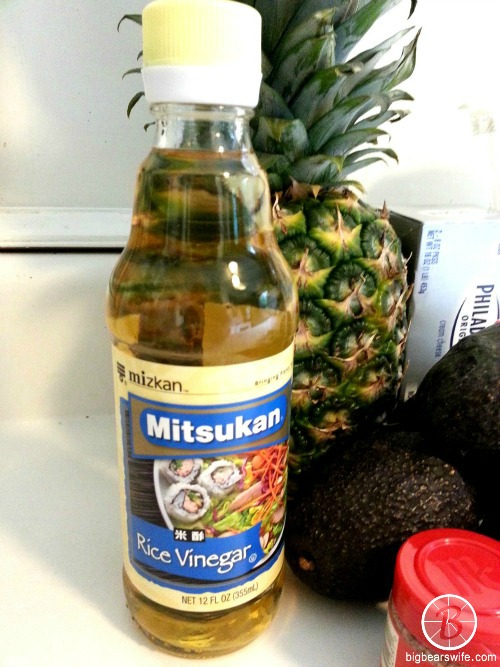
Rice Vinegar
A Sushi Rolling mat (found mine at World Market)
Plastic Wrap
and sesame seeds
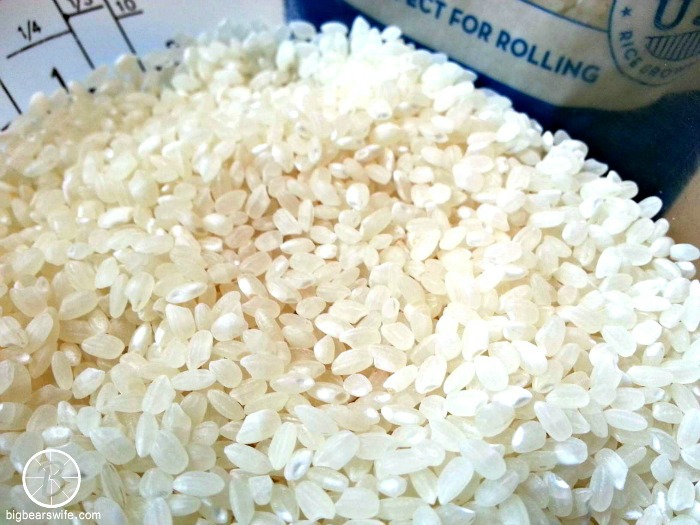
This is the Sushi Rice that I use. I get mine from Whole Foods.
See how it looks different than normal white rice? To make your sushi rice: Rinse sushi rice until water runs clear. Combine 1 cup sushi rice and 1 1/4 cup water to a sauce pan. Bring to a boil. Reduce to a simmer, cover and cook for 15 minutes. After rice it cooked, remove from heat, fluff with fork and scoop into a large bowl. Cover bowl with a damp towel and let rice cool. I normally let it come to room temperature or get a little cooler. (This normally take about 30 minutes or so at my house)
This is the packet of Toasted Seaweed that I buy. I get it from the Asian section of Wal-mart. I’ve also seen it at Food Lion.

This is the rice vinegar that I buy. It’s also from the Asian section in Wal-mart. I mix a little with cold water, dip my fingers into it and then work with the rice. It keeps the rice from sticking to my hands so much.
For this sushi, I used: Sliced Avocado, Diced Pineapple, Cream Cheese and Imitation Crab Meat.
I like to set up my work station with the rice bowl on the right, and a small bowl filled with cold water and a few tablespoons of rice vinegar. The water and rice vinegar mixture will help keep the rice from sticking to your hands.
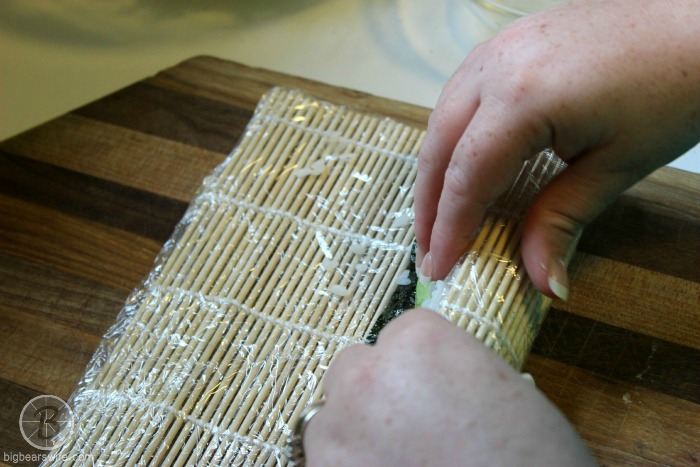
I place my fillings to my left and have my sushi rolling mat in the middle. Wrap your bamboo sushi rolling mat in plastic wrap to keep the sushi from sticking to it. I got my bamboo sushi rolling mat from World Market for about $2.00. But before I got that, I literally just used a bamboo place mat from walmart haha.
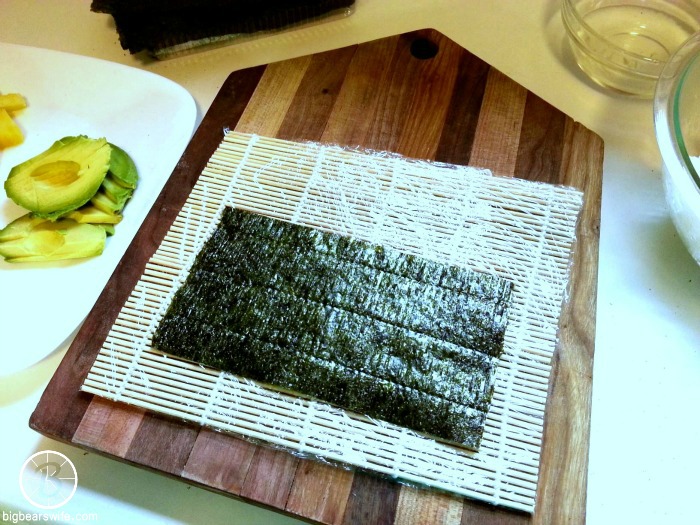
Lay the dried seaweed (or nori) down on the mat. Make sure that the rough side it facing up. Dip your fingers into the water/rice vinegar mix. Scoop up a handful of rice and press in onto the nori. Press it down and spread it out to cover the entire sheet.

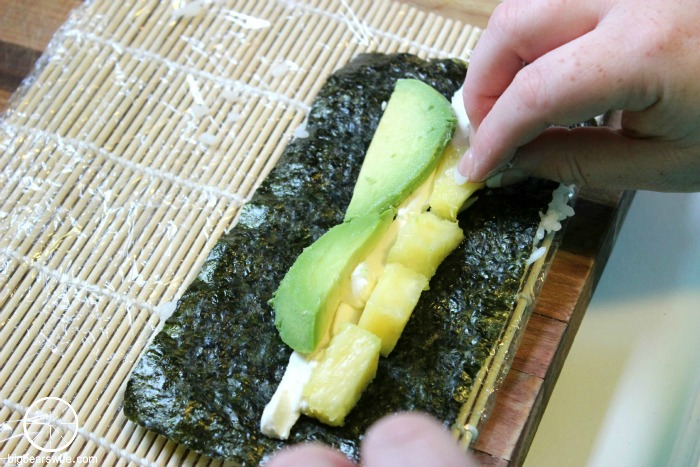
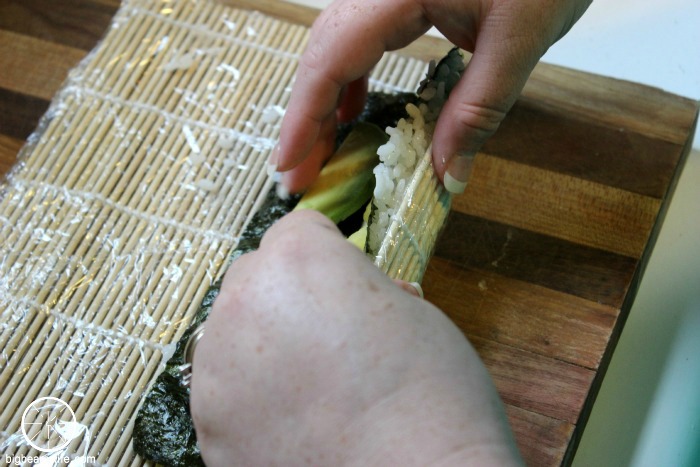
Flip the nori over. In the center of the nori sheet, add the filling. Make sure that the items are cut thin and don’t pack to much into the center or it’ll be to large to roll.

For these, I did, one strip of cream cheese, one strip of avocado, one strip of crab and a few slices of pineapple.
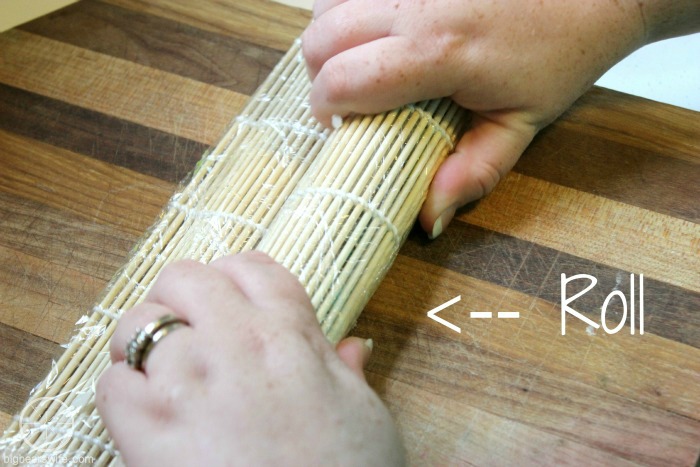
Starting at the end of the mat with the nori, roll the sushi like a Jelly Roll.
Stop half way though rolling to adjust the mat and continue to roll.
Gently apply pressure to the roll to shape it.
Carefully unroll the sushi roll, sprinkle with sesame seeds and place onto a cutting board. With an extremely sharp knife, carefully cut sushi into pieces. Arrange on a plate and enjoy.
Whoa! Did you get all of that? Sounds like a lot of work for a sushi roll, but after you’ve done it a few times it does get easier. Now for me the longest part is slicing all things for the filling. I hope I explained it good enough. If you have any questions let me know.
Of course I’m not saying this is the only way to make it or even the correct way haha, this is just how we make it, so I wanted to share 🙂

I’ve also got a little prize news for you! We’ve still got some great prizes to give away! And there is a Pin Chat tomorrow (Wednesday, July 3rd, 2013 at 4:30 EST) you can get to it here. We’re pinning some great recipes, chatting and announcing the winners! Please join us!
Each prize package includes:
1- $50 Visa gift card,
1- “I Love Avocados” t-shirt,
The newly released cookbook “Summer Thyme” from blogger Jennifer Dempsey
Fresh Vidalia onions
and squeezable herbs from Gourmet Garden.


.
{Avocado, Pineapple, Cream Cheese and Crab} #FlavorsofSummer
(amounts depends on how much sushi you’re going to make, I can normally get about 4-5 rolls from 1 cup sushi rice)
and sesame seeds
Instructions
To make your sushi rice: Rinse sushi rice until water runs clear. Combine 1 cup sushi rice and 1 1/4 cup water to a sauce pan. Bring to a boil. Reduce to a simmer, cover and cook for 15 minutes. After rice it cooked, remove from heat, fluff with fork and scoop into a large bowl. Cover bowl with a damp towel and let rice cool. I normally let it come to room temperature or get a little cooler. (This normally take about 30 minutes or so at my house)
For this sushi, I used: Sliced Avocado, Diced Pineapple, Cream Cheese and Imitation Crab Meat.
I like to set up my work station with the rice bowl on the right, and a small bowl filled with cold water and a few tablespoons of rice vinegar. The water and rice vinegar mixture will help keep the rice from sticking to your hands.
I place my fillings to my left and have my sushi rolling mat in the middle. Wrap your bamboo sushi rolling mat in plastic wrap to keep the sushi from sticking to it.
Lay the dried seaweed (or nori) down on the mat. Make sure that the rough side it facing up. Dip your fingers into the water/rice vinegar mix. Scoop up a handful of rice and press in onto the nori. Press it down and spread it out to cover the entire sheet.
Flip the nori over. In the center of the nori sheet, add the filling. Make sure that the items are cut thin and don’t pack to much into the center or it’ll be to large to roll.
For these, I did, one strip of cream cheese, one strip of avocado, one strip of crab and a few slices of pineapple.
Starting at the end of the mat with the nori, roll the sushi like a Jelly Roll.
Stop half way though rolling to adjust the mat and continue to roll.
Gently apply pressure to the roll to shape it.
Carefully unroll the sushi roll, sprinkle with sesame seeds and place onto a cutting board. With an extremely sharp knife, carefully cut sushi into pieces. Arrange on a plate and enjoy.
Yields: about 5 sushi rolls

Leave a Comment