

It’s been almost a month since my sweet god-daughter Kendra turned 5. I normally make her birthday cake (and her sister’s) so when I got a message from Nikki that said Kendra was super excited about her Angie making her birthday cake, we got straight into planning.
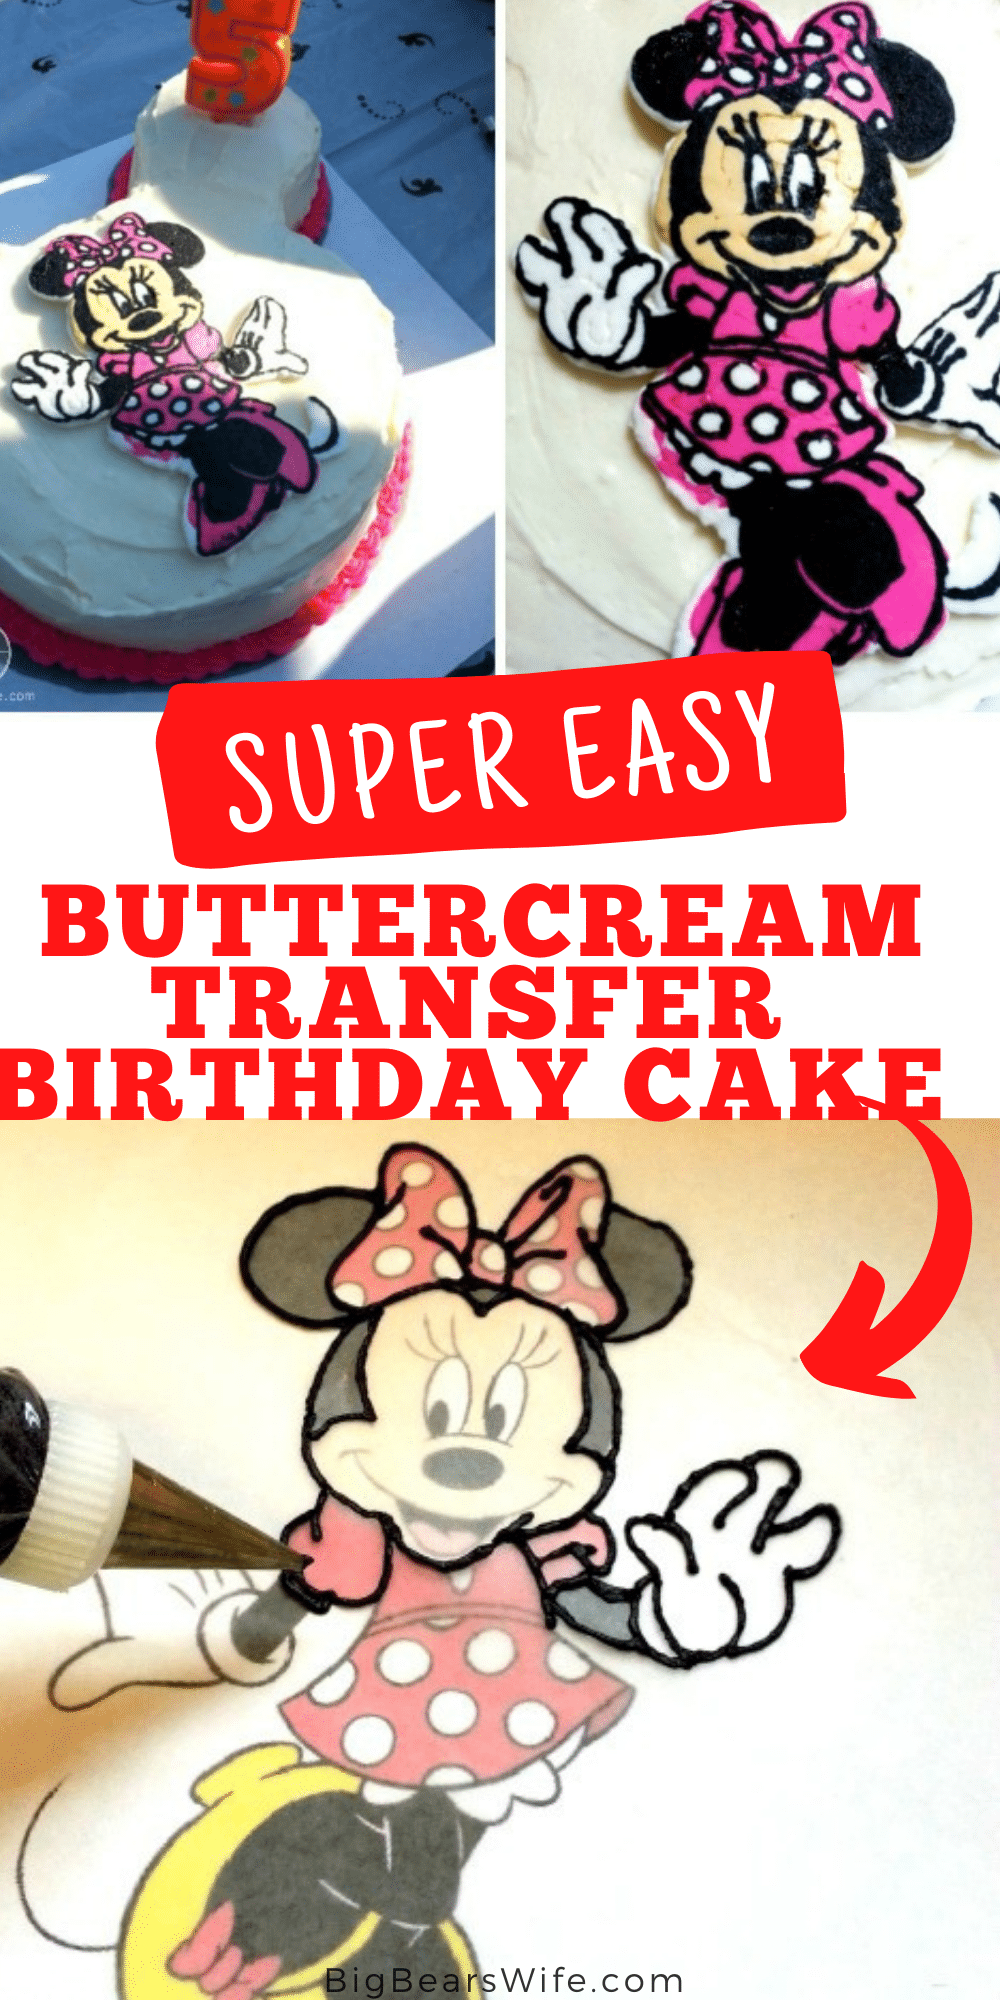
I didn’t really have the extra time to do a huge carved type of cake (and cake stresses me out anyways, these girls better know that I love them! haha) so after going over what she wanted, we settled on a Mickey Mouse shaped cake with a Minnie Mouse Frozen ButterCream Transfer on top!
I had never done a ButterCream Transfer but my sister in law had done one before and that’s what kind of gave me the idea. I went straight to YouTube and Google to see what all needed to be done for this ButterCream Transfer. It looks pretty easy enough, so I gathered everything I needed and made about 2 practice ButterCream Transfers of Minnie Mouse a few weeks before the party to make sure that I could actually make it happen. It came out nicely so I knew that it would be perfect for Kendra’s Minnie Mouse Birthday Cake!
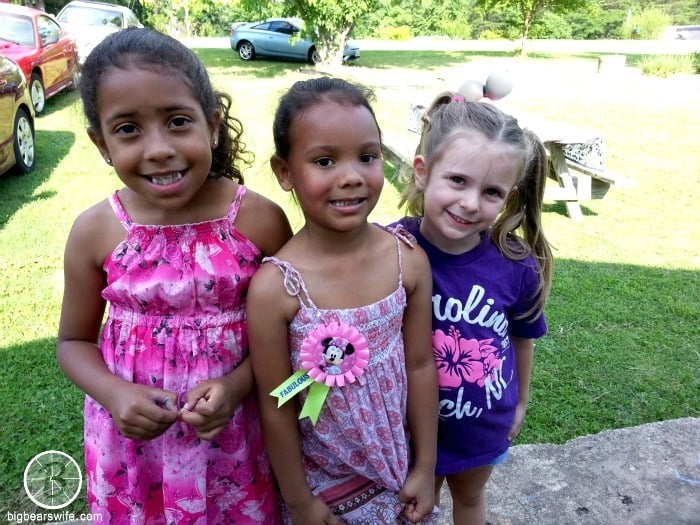 |
| My God-daughters Alyssa and Kendra & my niece Savannah |
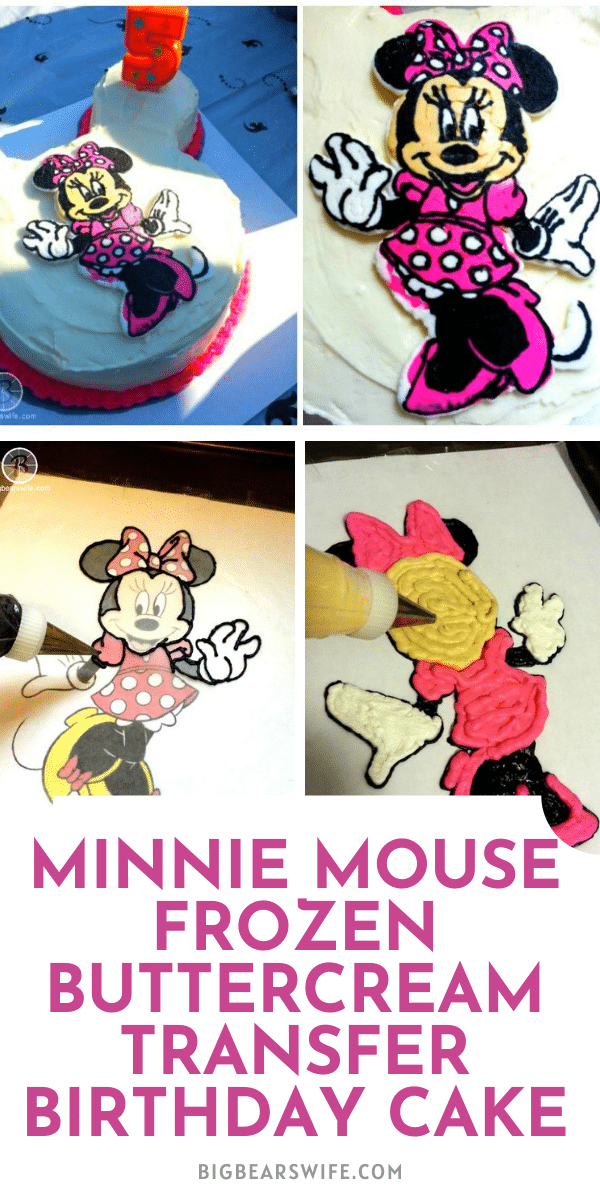
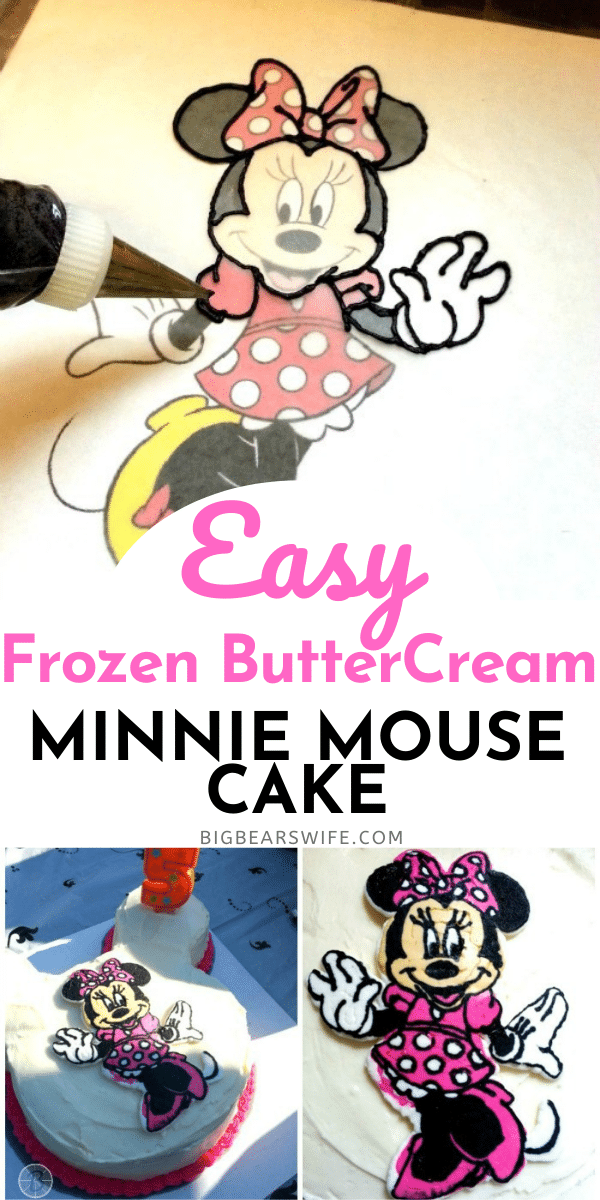
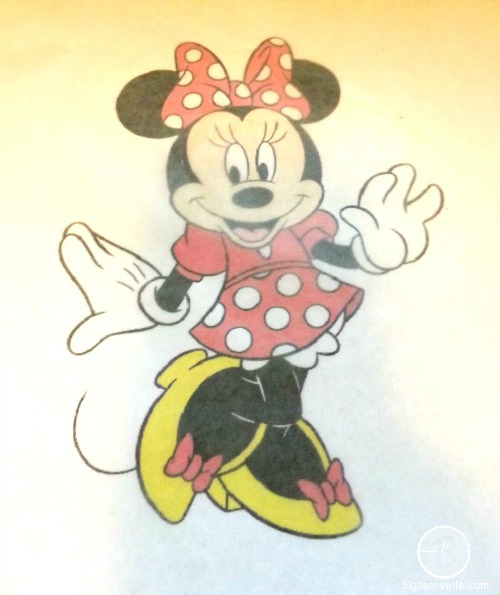
She wanted the “New Minnie”, the one with the pink polka dot dress and pink shoes. I couldn’t find a good photo of the new Minnie, so I grabbed a Clip-Art of Minnie Mouse in the red polka dot dress and just changed the color.
The frozen buttercream transfer takes a little time and some patience but I love how it turned out and can’t wait to use this on cakes in the future.
(As I always say, I am NO cake maker. For some reason these little ones love, love, love “Angie Cakes” so I make them, we eat them and we’re happy haha)
What you’ll need to make a Minnie Mouse Frozen ButterCream Transfer Birthday Cake:
For the Minnie Mouse Frozen ButterCream Transfer:
(You’ll need to make this about 24-48 hours before you need it, it have to freeze)
What you’ll need:
Crusting ButterCream Icing (recipe below)
Gel Food Coloring (I used pink, ivory and black)
Piping tips and piping bags
Wax paper
Tape
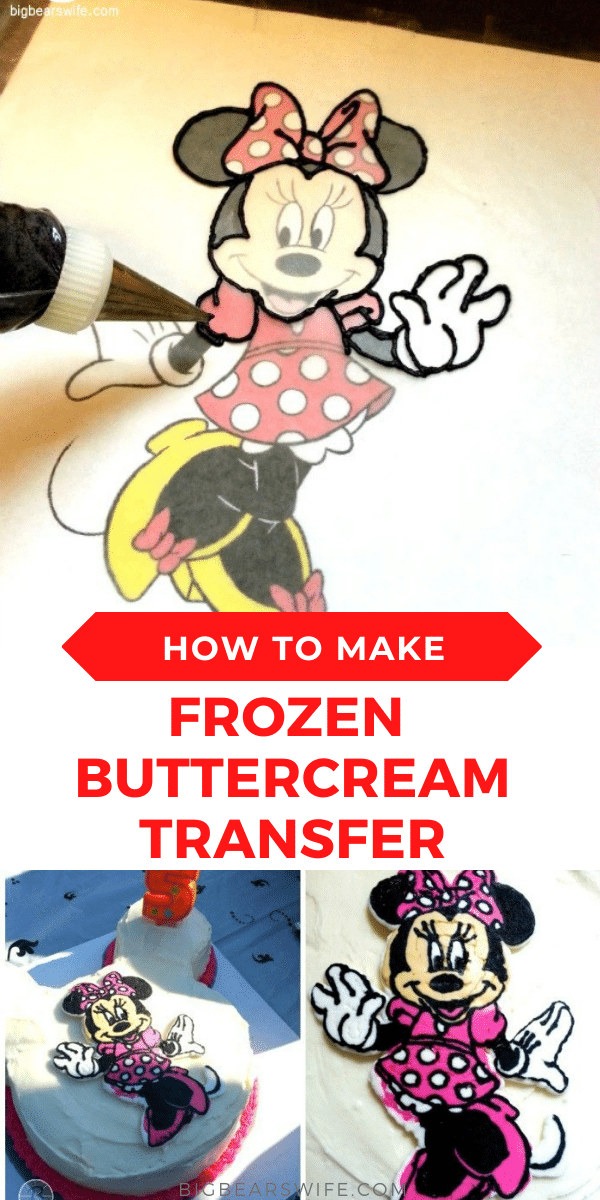
Print out of Image (Minnie Mouse) (Make sure to use a mirrored image, it will be reversed after it’s made and it’s flipped!)
Cookie sheet
First you’ll need to do is make the icing:
(This is only the icing for the transfer, I make a different icing for the actual cake)
What you’ll need:
1 cup of shortening
1 cup butter, softened
2 pounds of powdered sugar
3-4 tablesoons milk
2 teaspoons vanilla extract
What to do:
In a stand mixer slowly mix together the shortening, softened butter and powdered sugar. Mix until combined. Add milk and mix. Add in vanilla and mix until everything is combined.
Next You’ll need to make the Minnie Mouse Frozen ButterCream Transfer!
Place the Print out of Image on a cookie sheet and tape it down. Next tape a piece of wax paper over the image and tape it down.
Separate the icing into 4 bowls.
Mix one bowl of icing with hot pink food coloring.
Mix one bowl of icing with black food coloring.
Mix one bowl of icing with ivory food coloring.
Leave one bowl of icing white.
Fill 4 piping bags fitted with #5 tips with the 4 icing colors. (You’ll need more of the pink, white and black than the ivory)
1 bag of hot pink icing.
1 bag of black icing.
1 bag of ivory icing.
1 bag of white icing.
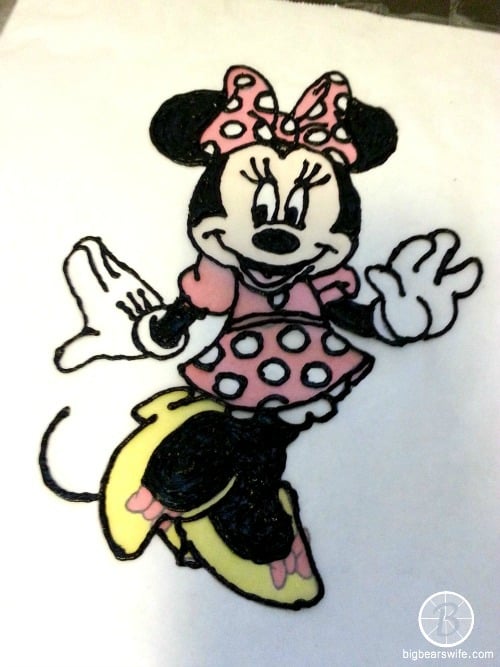
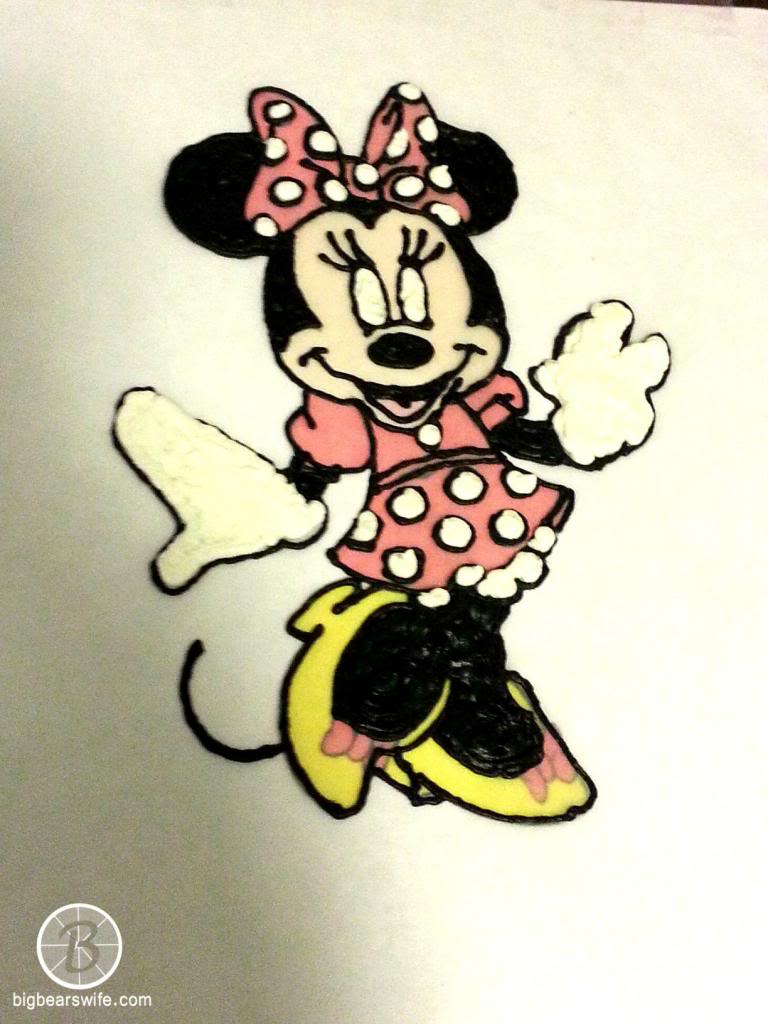
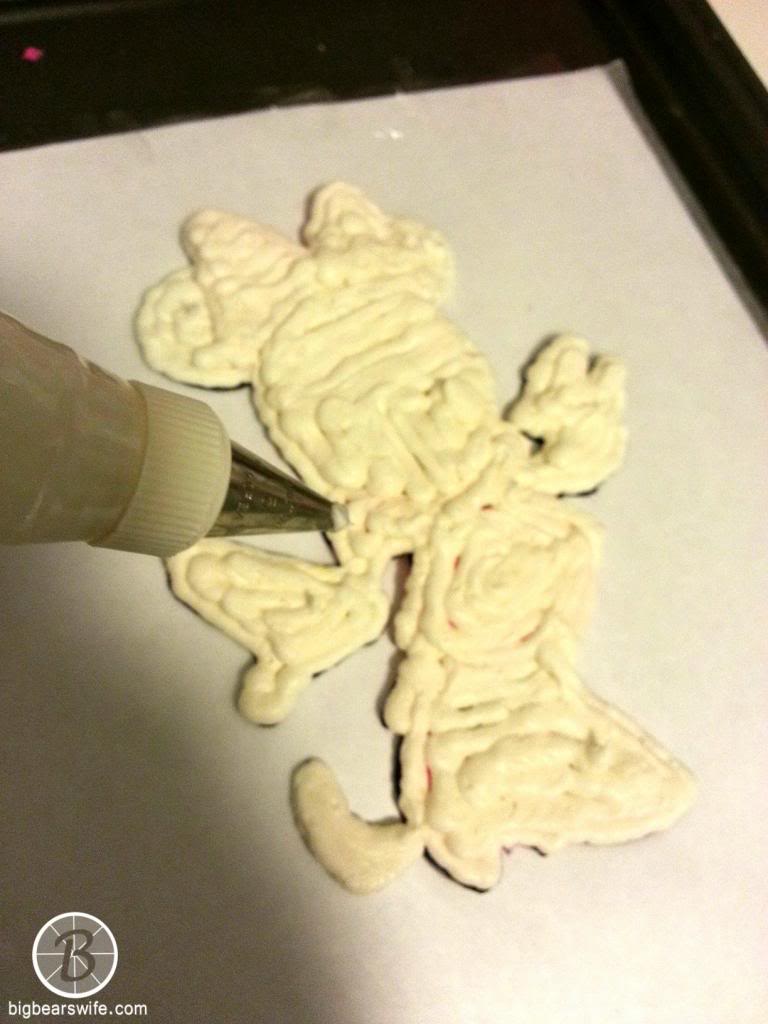
Minnie Mouse had a lot of layers but some other designs might not have as many!
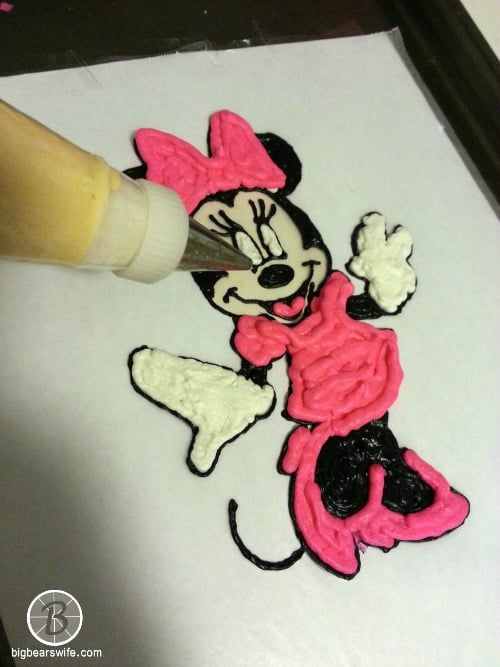
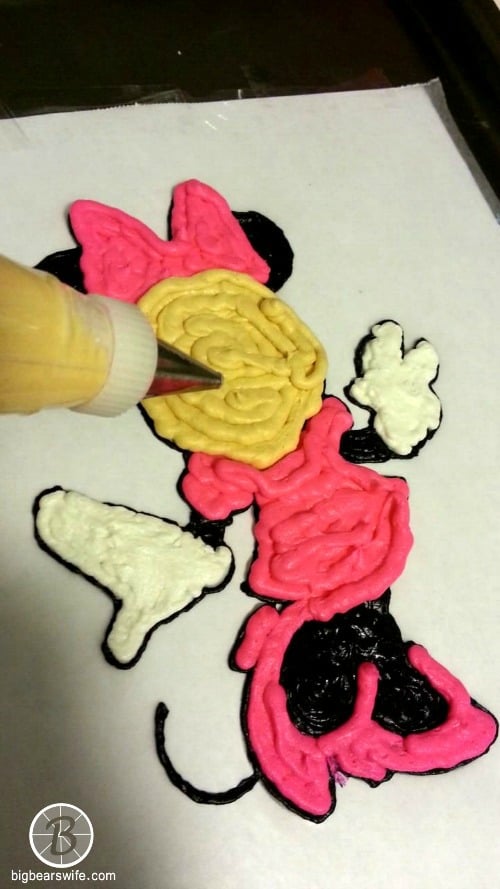
Using the piping bag of black icing, carefully trace the outline of Minnie Mouse.

Place the cookie sheet into the freezer and let freeze for 15 minutes.

Remove from the freezer and filling in all of the areas that need to be black with the black icing.
Place the cookie sheet into the freezer and let freeze for 15 minutes.
Remove from the freezer and filling in all of the areas that need to be white. (Polka dots and gloves)
Place the cookie sheet into the freezer and let freeze for 15 minutes.
:
Remove from the freezer and filling in all of the areas that need to be pink.
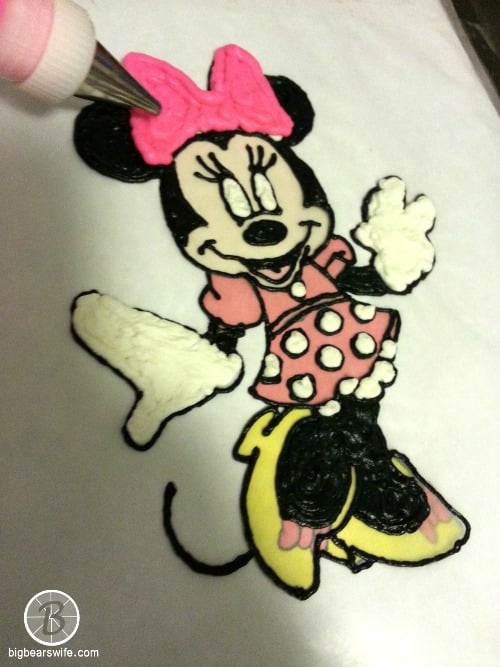
This includes her bow, dress and shoes.
And then the face that needs to be ivory.
Place the cookie sheet into the freezer and let freeze for 30 minutes.
Remove and cover the entire transfer with while buttercream (this kind of gives it a background and will make it more stable)
Press a piece of wax paper onto the back of the transfer and lightly smooth out.
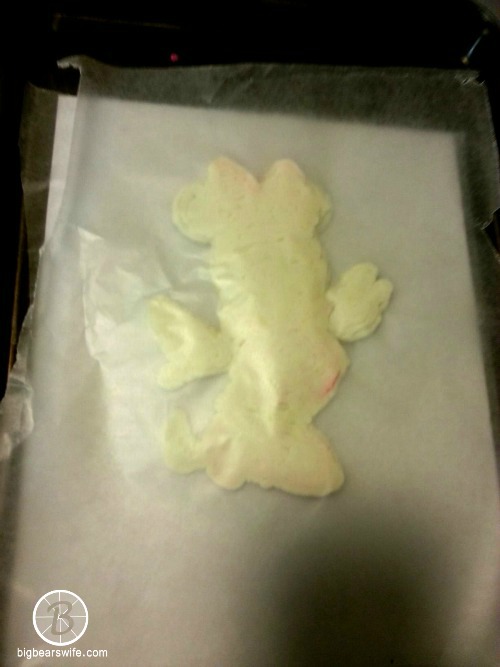
Place in the freezer. I let mine freeze for about 48 hours because I was worried about it not freezing (I panic about things like that haha)
When you’re ready to make the cake:
You’ll need:
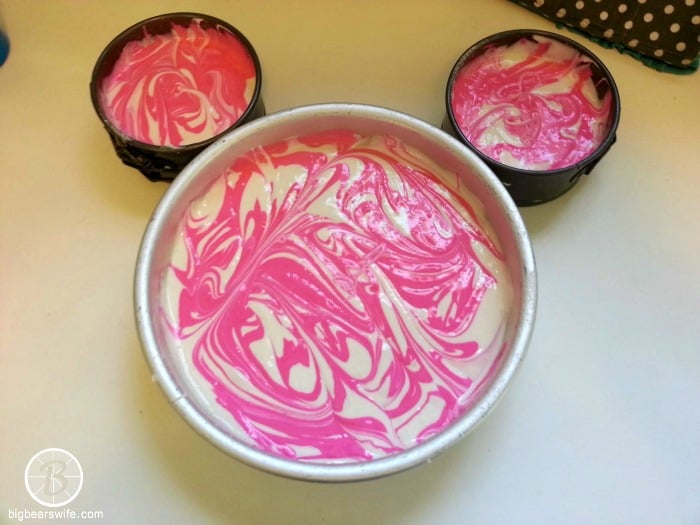
1 large round cake (Recipe below)
2 smaller round cakes
Cream Cheese Icing (Recipe below)
Pink food coloring (optional)
1 – Minnie Mouse ButterCream Transfer
I used this recipe for the cake but you can use any recipe!
2 box white cake mix
2 cups all-purpose flour
2 cups granulated sugar
2 teaspoons salt
8 egg whites
1 1/2 cups water
4 tablespoons vegetable oil
2 cup sour cream (16oz container)
4 teaspoon vanilla
Pre-heat oven to 350F. In a large bowl, mix together cake mix, flour, sugar, and salt. In the bowl of a mixer, mix together the egg whites, water, and vanilla. Mix on low for about 10 seconds.
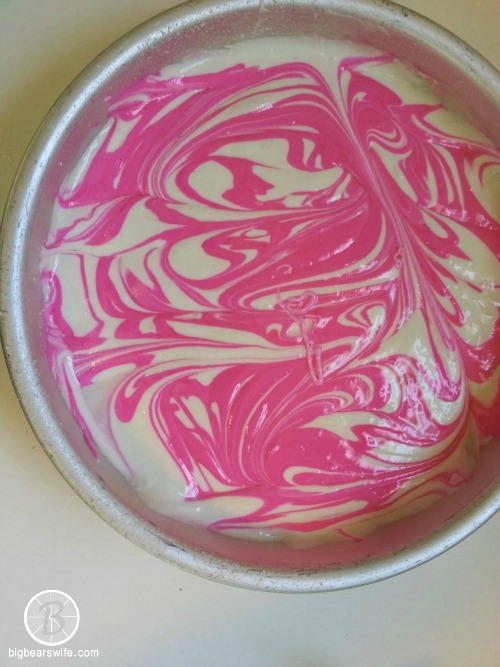
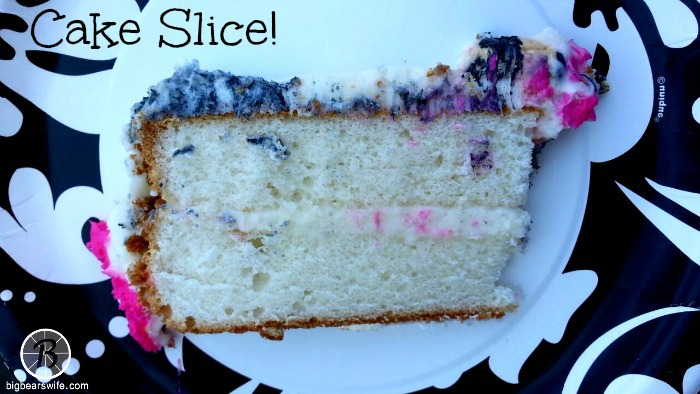
Slowly add the dry mix a little at a time. Mixing on low until everything is combined. Add sour cream and mix well. Add color now if desired. (I swirled a little pink batter into the white for a marble affect)
Mix well. Pour into cake pans and bake for 30 minutes or until done. Remove from oven and cool.
Recipe for the icing I use:
1 cup butter
8 cups powdered sugar
2 teaspoons vanilla
8 oz Cream cheese
4 tablespoons heavy cream
Cream butter in the bowl of a mixer. Add cream cheese and mix well. Slowly add powdered sugar while mixing. Add vanilla and heavy cream and mix until combined.
For the cake:
Once cooled, place the cakes in the shape of Mickey Mouse on a cake board. (I sliced my cake in half andf filled it with some of the icing) Frost the cake with a crumb coat and place into the fridge for 1 hour.
Remove cake from fridge. Finishing frosting the cake and decorate with any pink details. (I just added a simple pink border around the base)
Once the cake is done, remove the Minnie Mouse Frozen ButterCream Transfer from the freezer. Use a sharp knife and carefully cut Minnie Mouse out (a rectangle around her works well)
Move quickly so that the buttercream doesn’t thaw. Flip the butter cream transfer over onto the cake. Peel the wax paper off!

That’s it! (If re touching is needed, use some of the icing and a toothpick to fix any small smudges!)
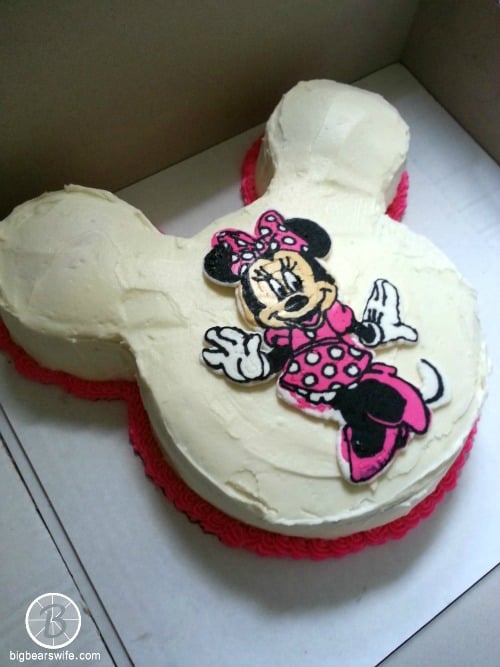
It may not be perfect, but Kendra loved it and that’s all that matters! 😉

2 pounds of powdered sugar
3-4 tablesoons milk

Awwwww HOW CUTE!
Love it. So cute. I am going to a Mickey Mouse for Weston’s birthday in a couple of weeks.
Love it. So cute. Can’t wait to do Mickey Mouse for Weston’s birthday in a couple of weeks.
One question what size pans did you use?
I believe the big one was an 8inch pan and the little ones where 4 inch springform pans
I’ve never done a buttercream transfer. You did a wonderful job. No wonder the girls love your cakes.
That turned out so great! What a fun project. I’m sure she was absolutely thrilled with her cake. I’m not sure I’d get past the first step 🙂
This looks fantastic! I love it! Thanks for sharing. This gives me ideas for my little brother’s cakes in the future (probably not Minnie).
This is really cool! I love the idea, but I wonder if it would work with royal icing? Also, is this edible? I mean obviously it’s just frosting, but would it thaw enough for kids to eat and enjoy it?
Hey! I’ve tried it with royal icing before and I have a hard time getting the royal icing to set. But the frosting defrost really fast so it’s easy to cut and eat! 🙂
How far in advance can you make and freeze this?
I would say that a week would probably be ok. I’ve done them about 3-4 days in advance 🙂
Thanks for the tutorial! I used this technique for my daughter’s birthday party today and it worked beautifully! Will definitely use again.
YAY! I’m so glad that you liked it! What kind of design did you make? Minnie or another character?