
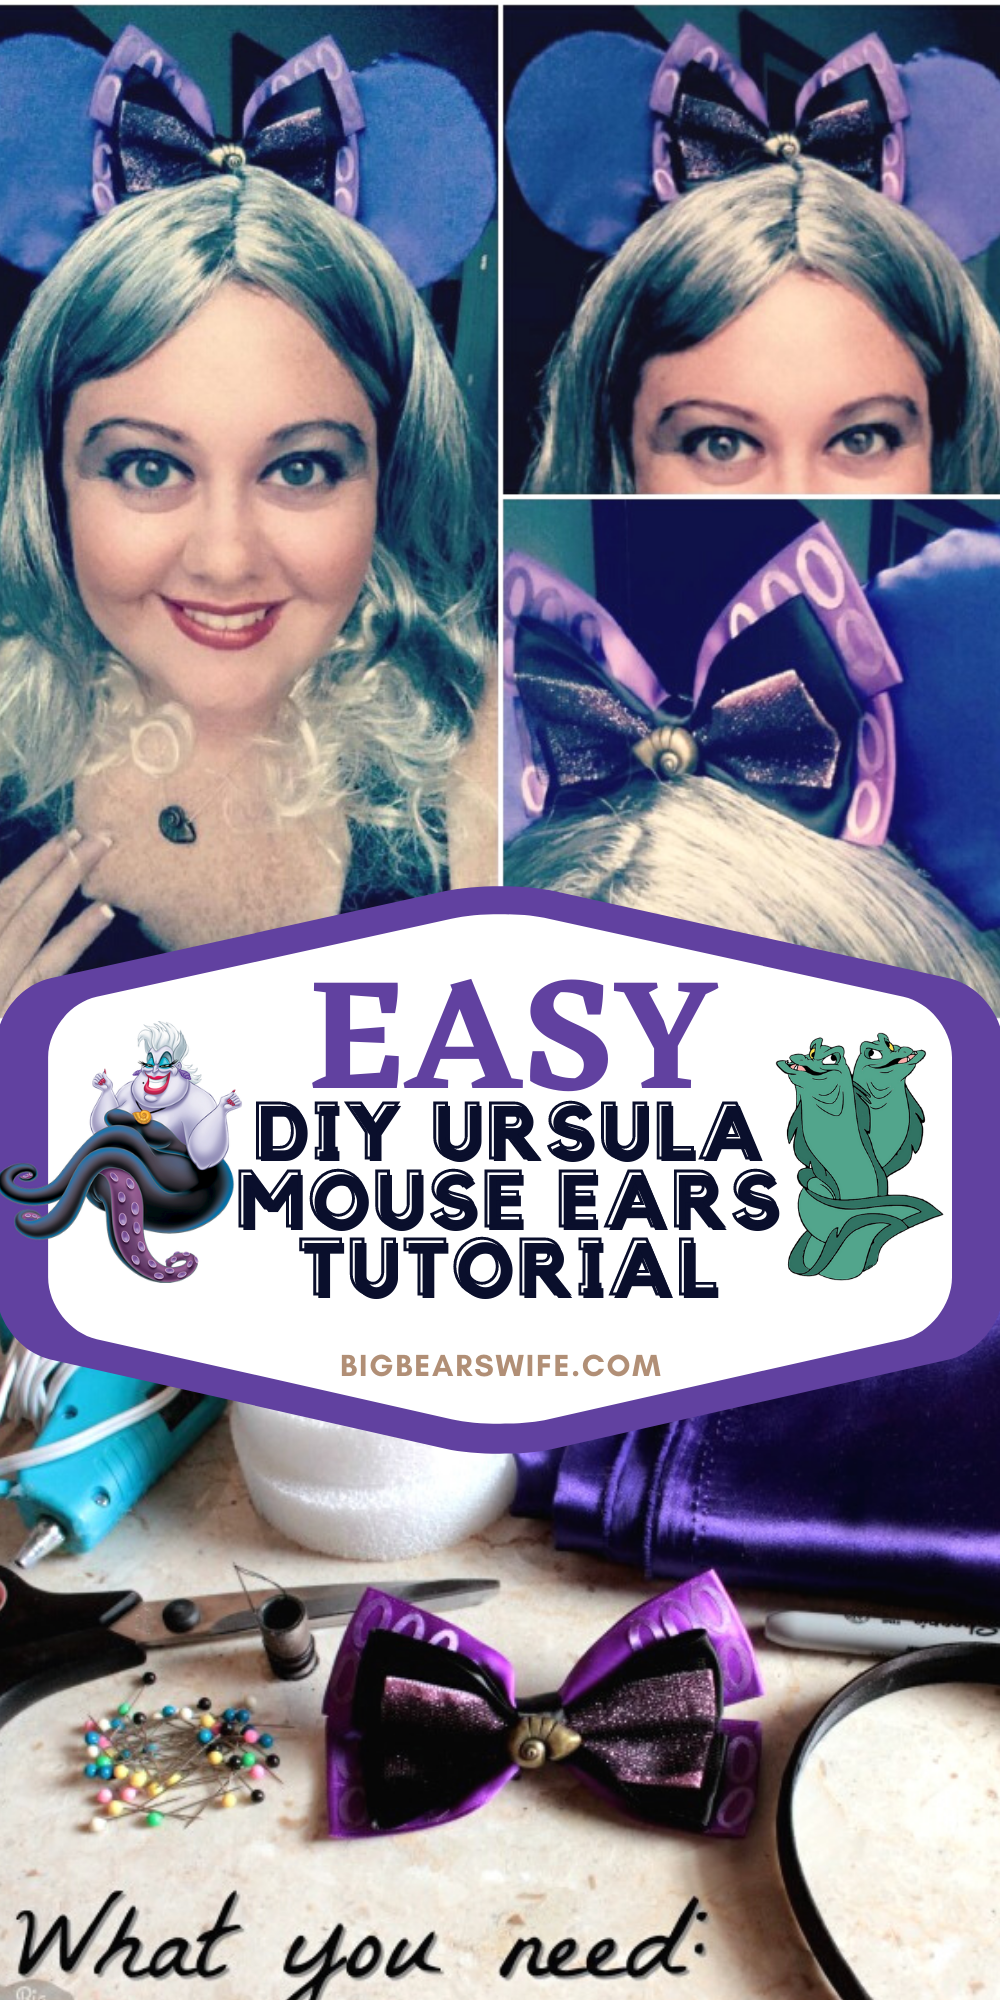
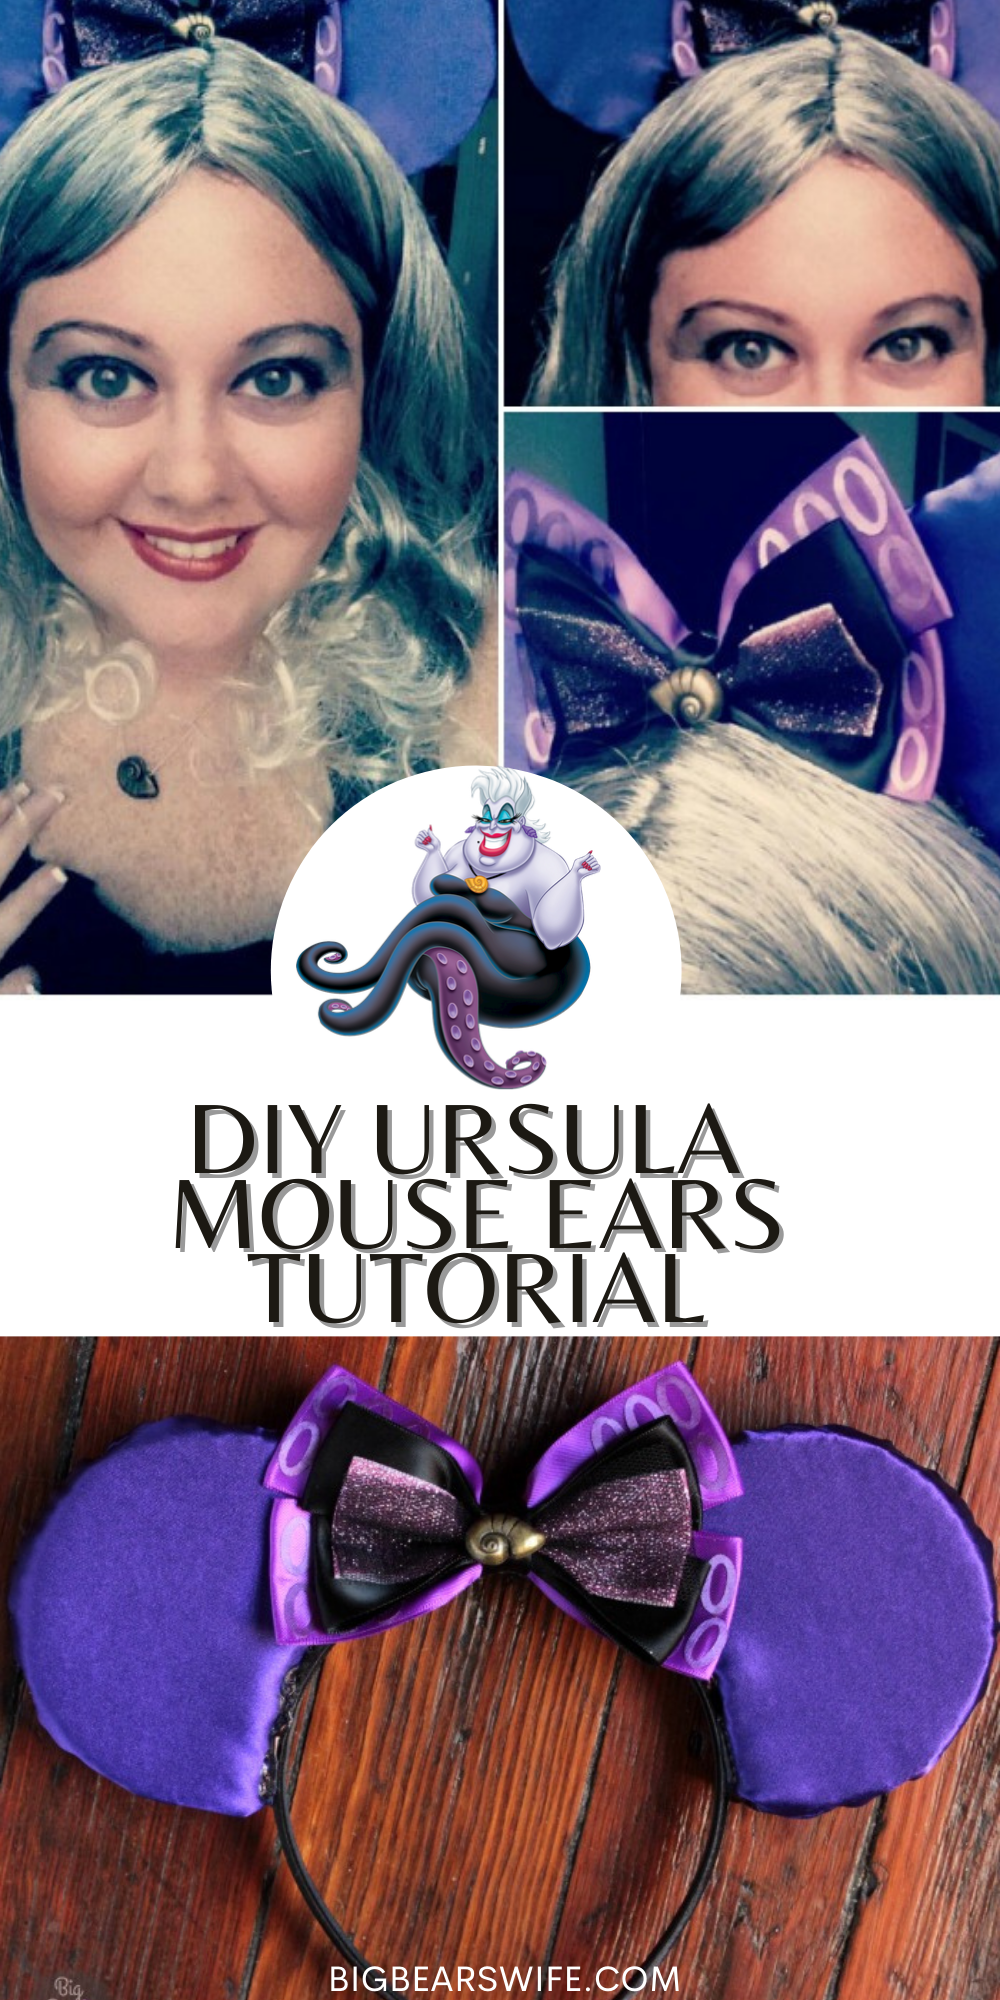
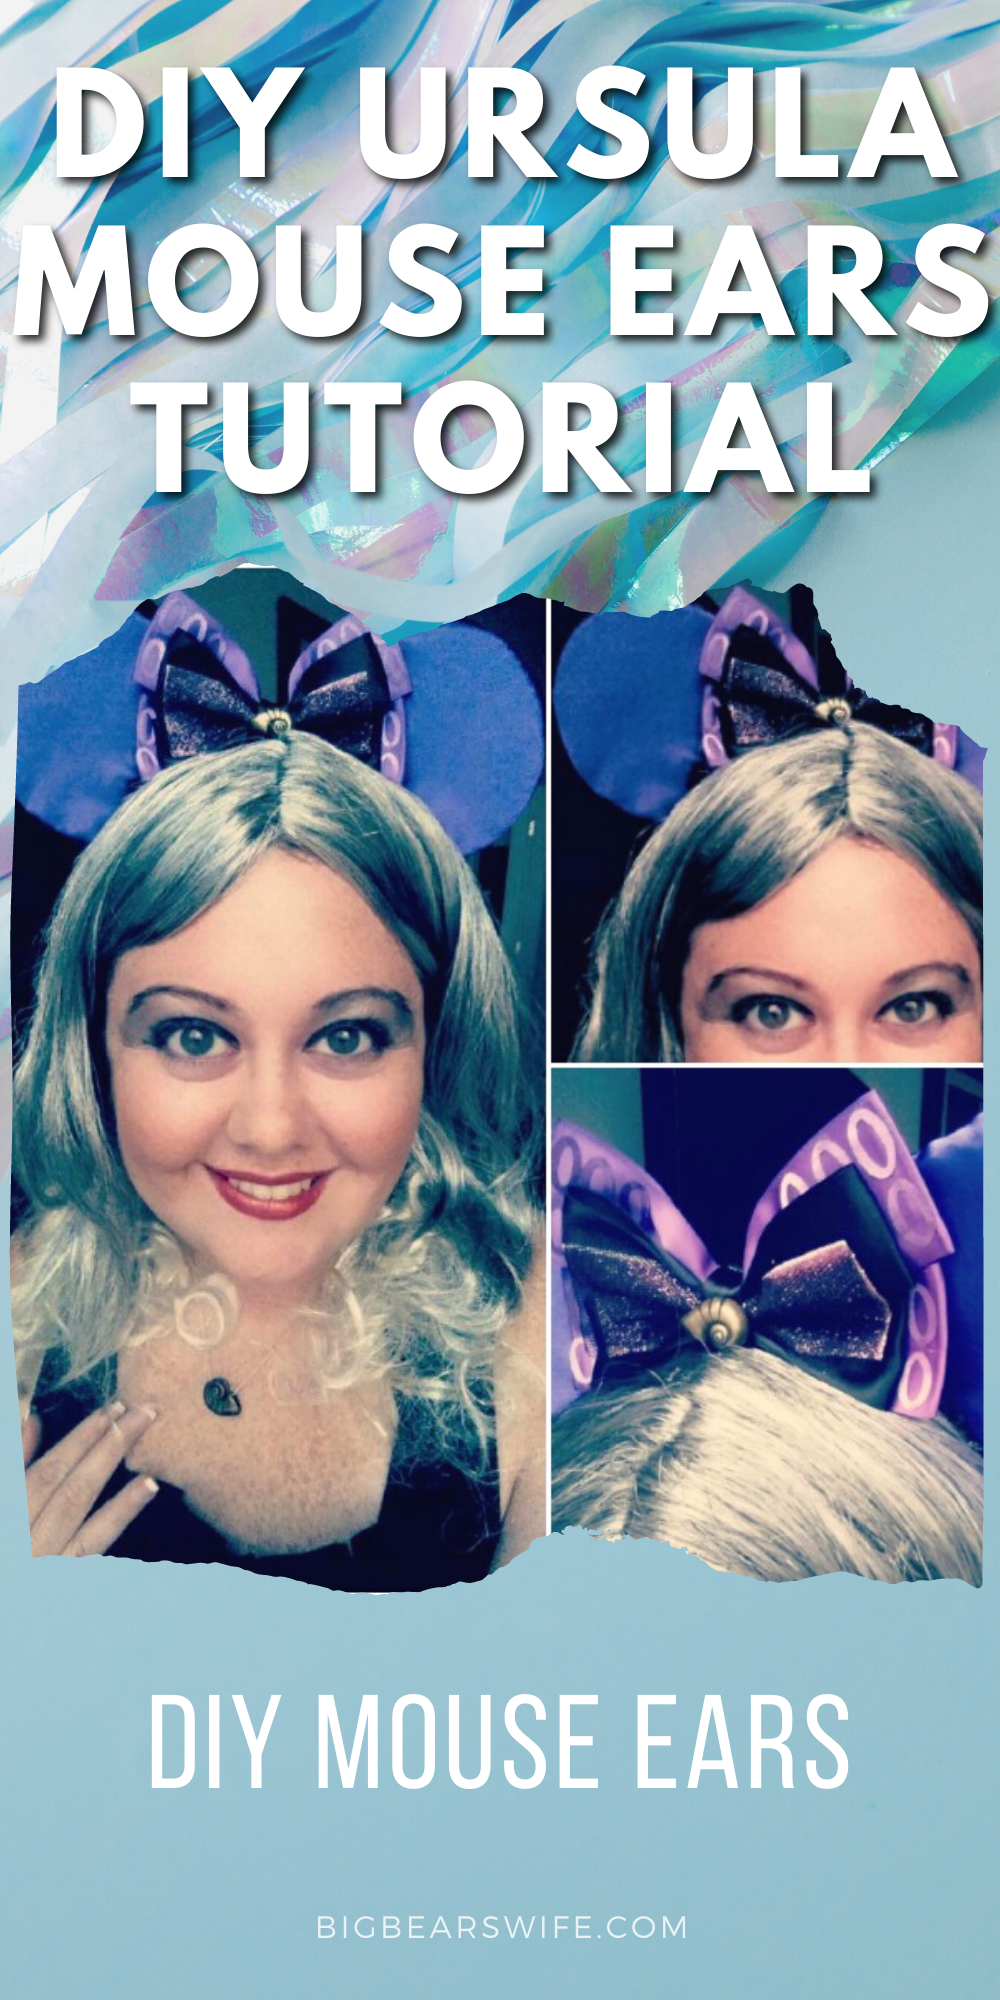
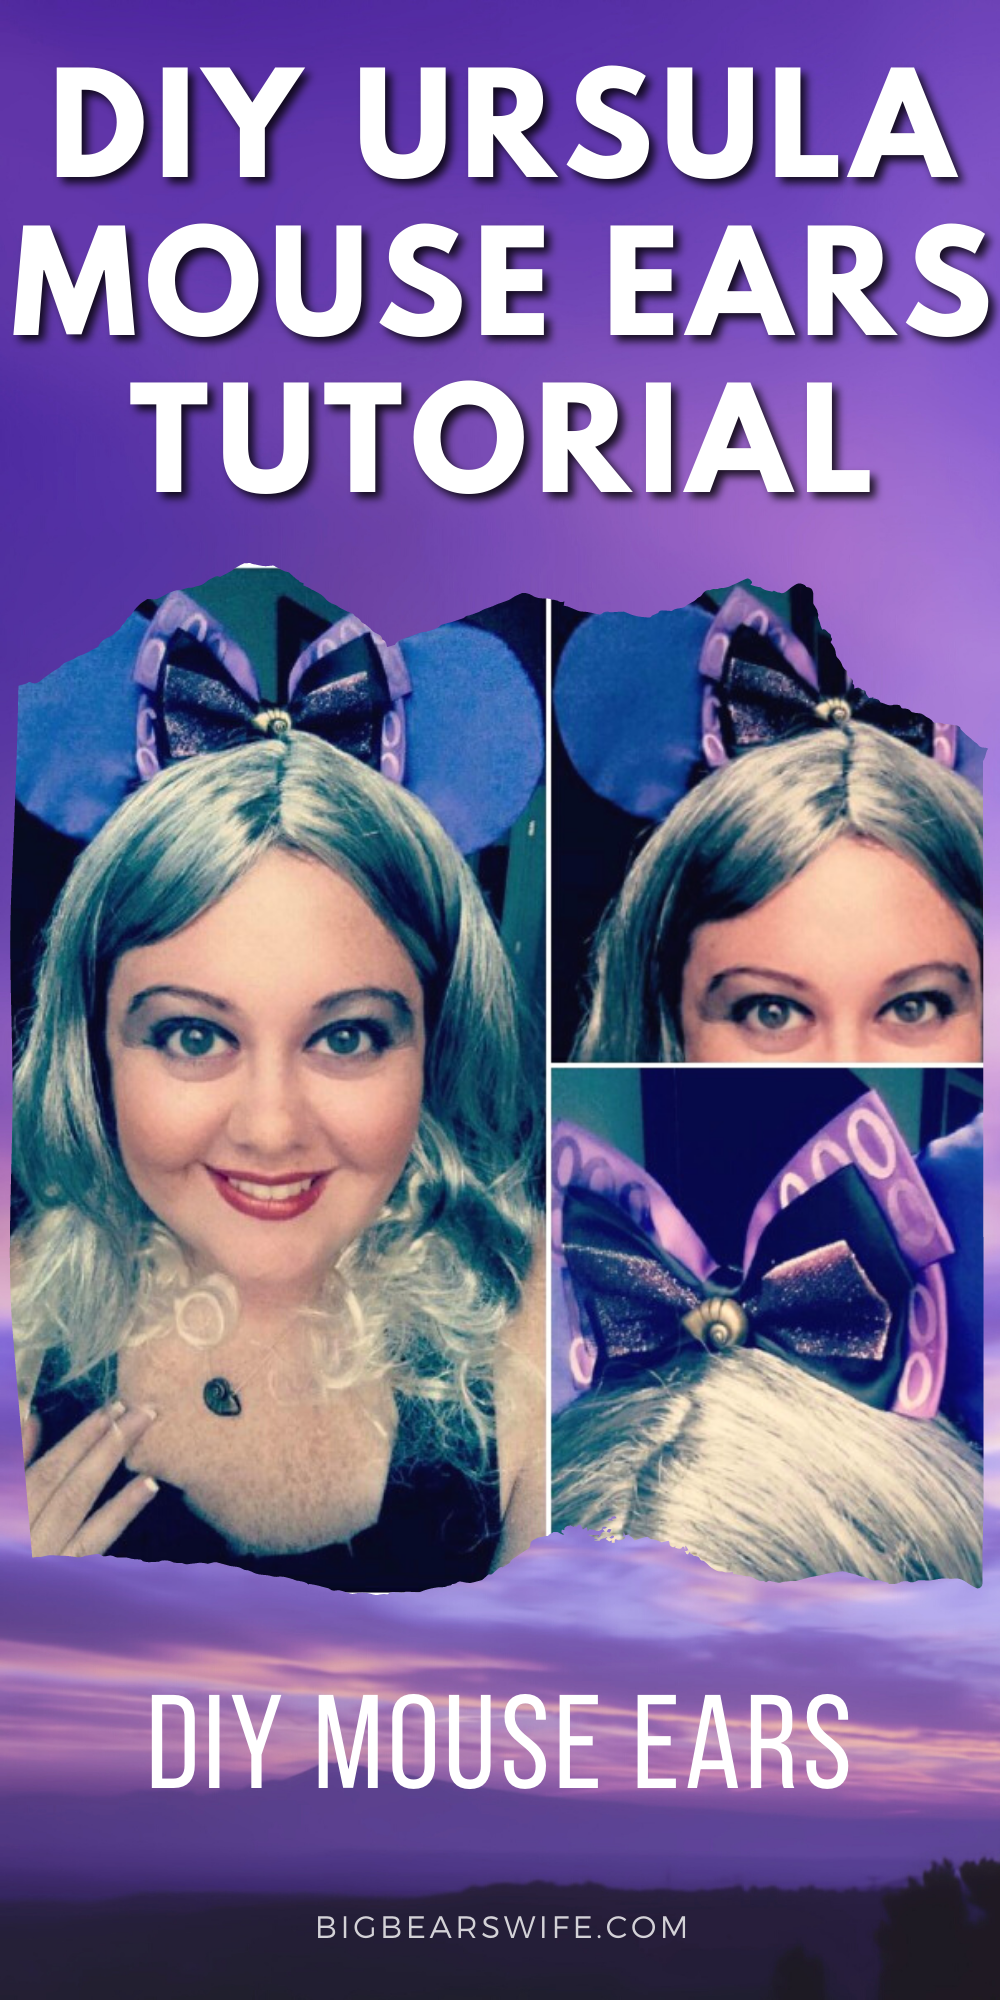
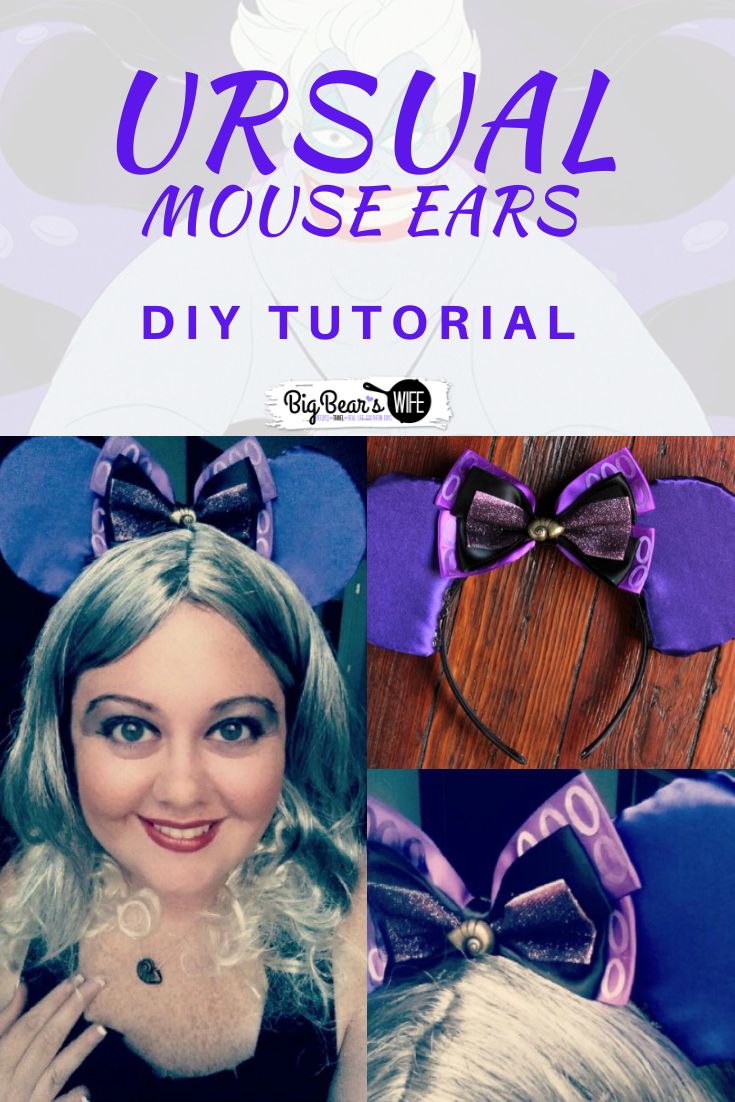
Want to make your very own Ursula Mouse Ears for your trip to Disney? I’ve got the step by step photo tutorial to show you how it’s done! Don’t want to make Ursula Mouse Ears? Just follow this tutorial and swap out the fabric and bows for any type of mouse ears!
Whenever we go to Disney World, I always end up picking up at least one new set of mouse ears.
I always start off with the plan to skip the mouse ears this trip. However, once I see them at Disney Springs and the Magic Kingdom I just have to have them. Which means I end up spending somewhere between $20 and $30 on mouse ears that look like everyone else’s.
Well y’all, that’s not going to happen this year! I made my own Mickey (Minnie) Mouse Ears for our trip! Actually I made 3 pairs for our trip and all of them are Halloween themed!
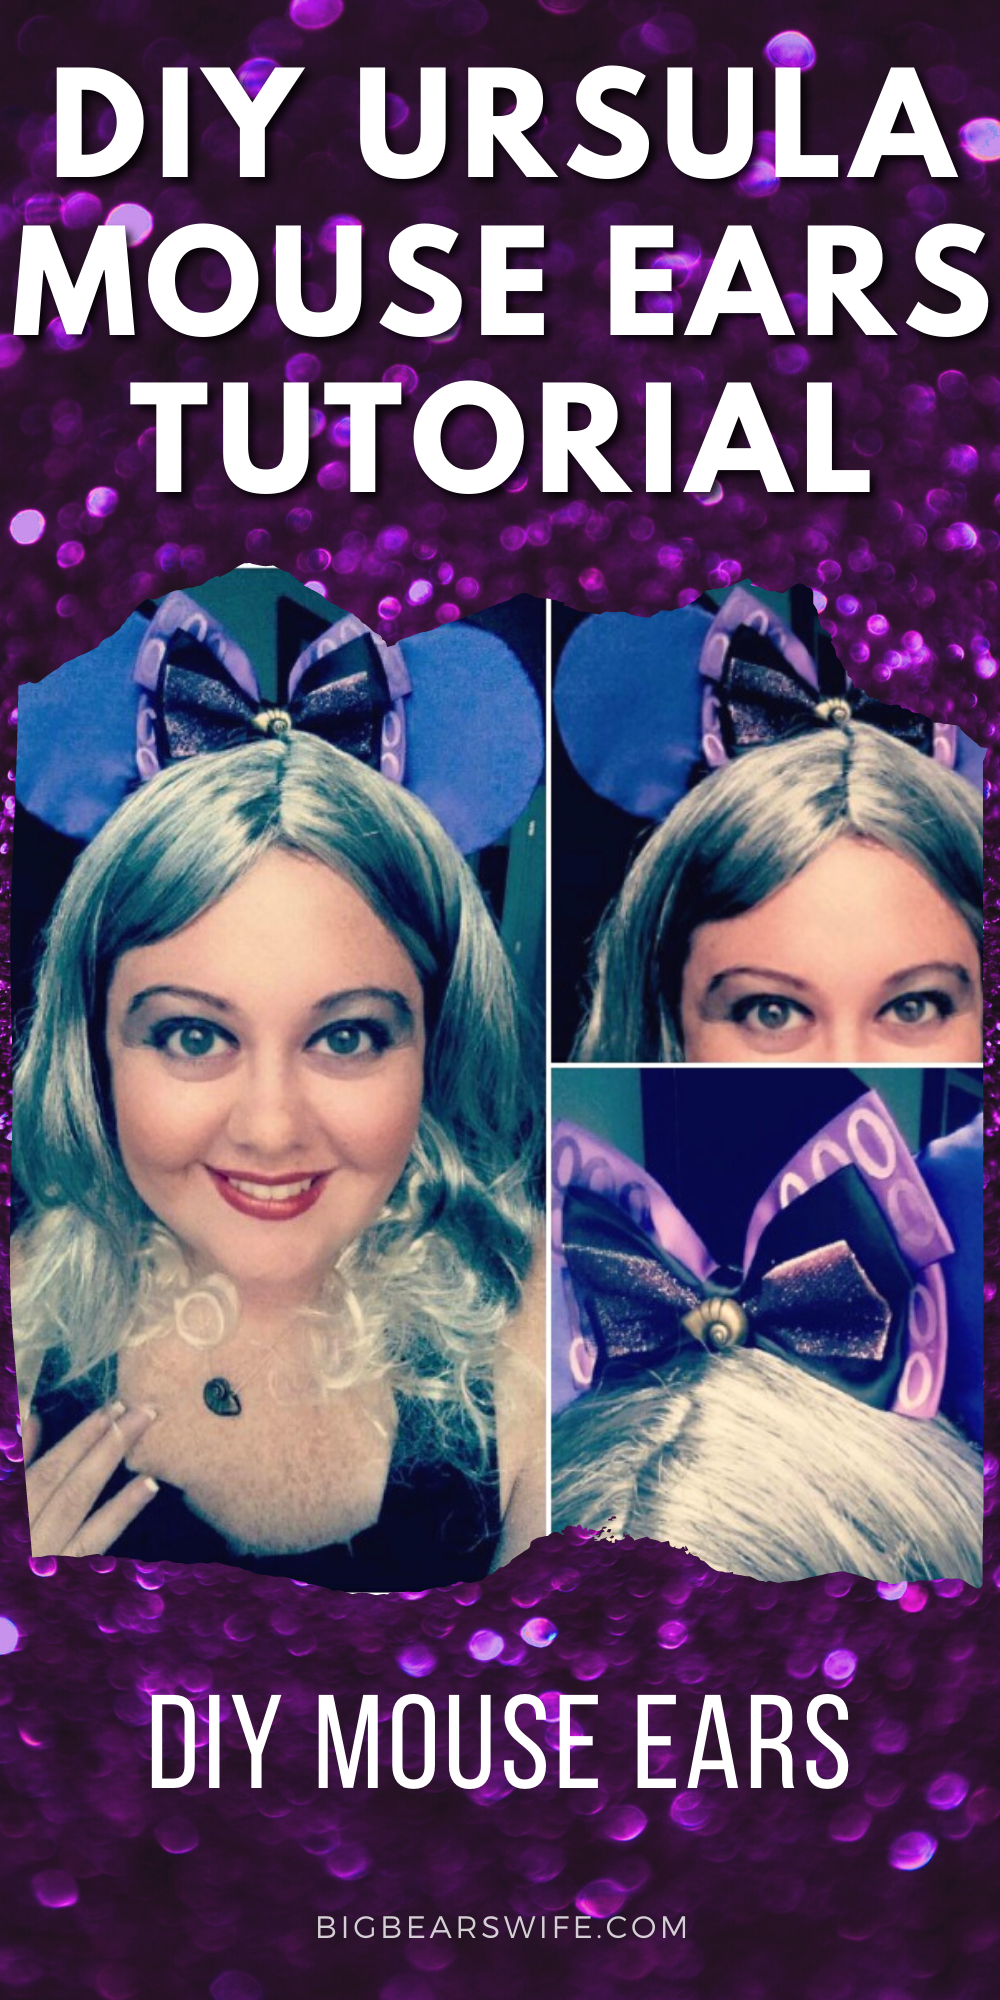
We’re going to Mickey’s Not So Scary Halloween Party when we’re at Disney World this year and I’m going to be URSULA!! EEEKKKK I’m so excited! So that’s what I’m sharing with y’all today, my Ursula Mouse Ears. However you can use this method to make any type of mouse ears!
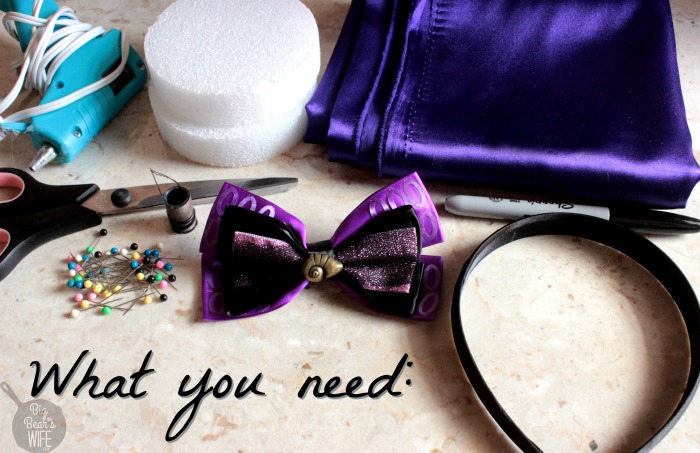
What you’ll need for Ursula Mouse Ears:
- Purple Fabric – I bought 1/4 of a yard and didn’t need all of it
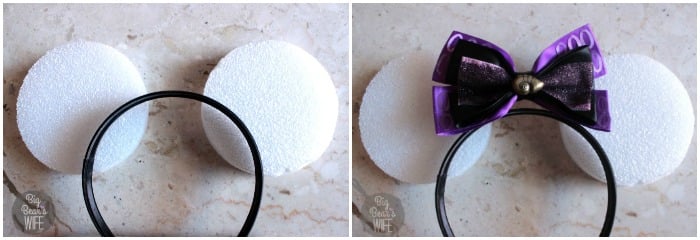
- 2 – 3 or 4 inch styrofoam discs (depending on how big you want your ears to be)
- 1 headband
- 1 bow (or fabric to make a bow)
- Hot Glue Gun
- Straight Pins
- Needle and Thread
- Scissors
- Sharpie
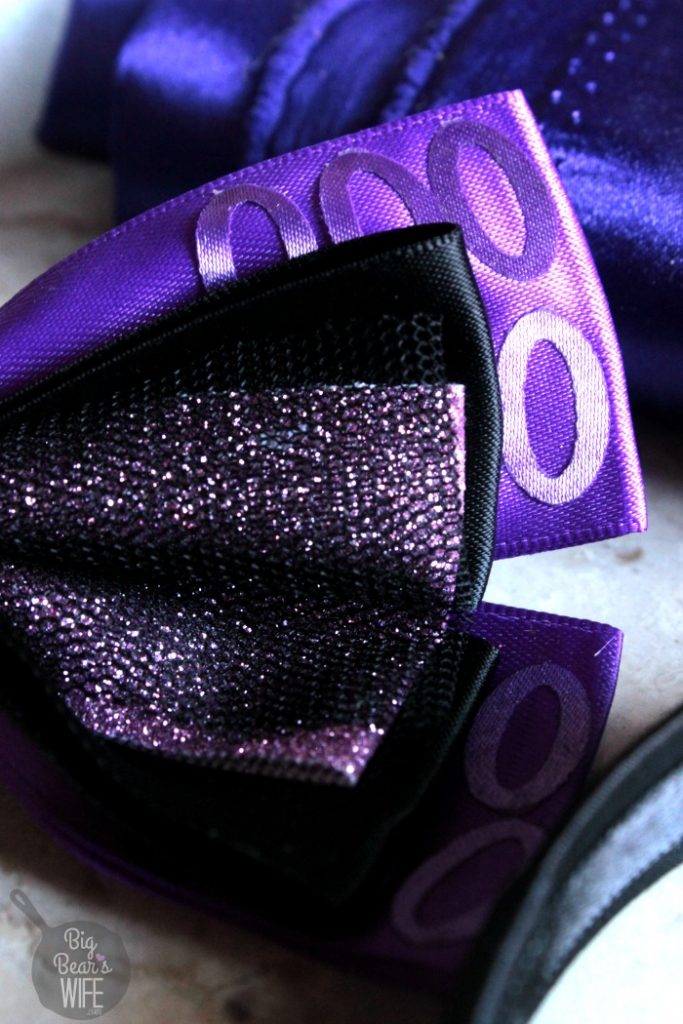
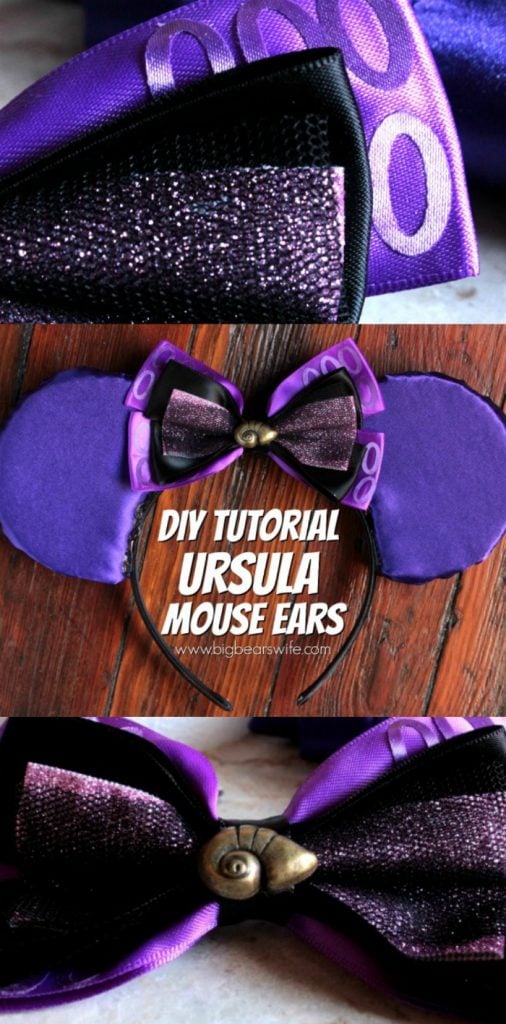
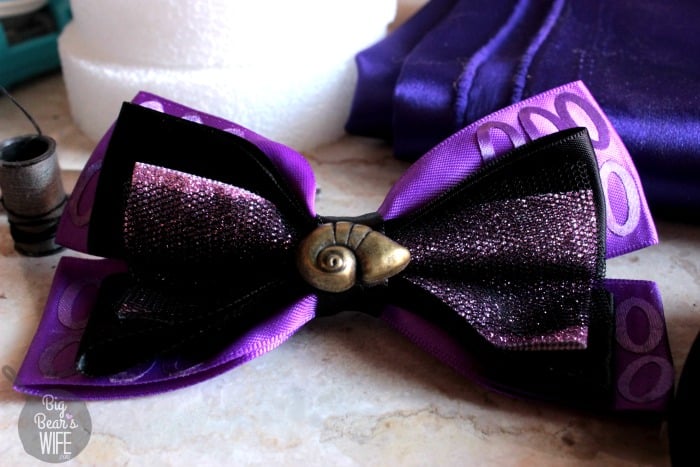
This is the bow that I used for my Ursula Mouse Ears. I bought it on sale at Hot Topic with a matching necklace for my costume. I just pulled the metal hair bow backing off of it so that I could glue it to my mouse ears.
However, there are TONS of bow making tutorials on YouTube. Just search “cheerleader bow making tutorial” and you’ll find a ton of great videos if you can’t find a premade bow. I’ve also found quite a few pretty Ursula bows on ETSY, so that might be an option too if you don’t want to make a bow.
But let’s move on into making the mouse ears!
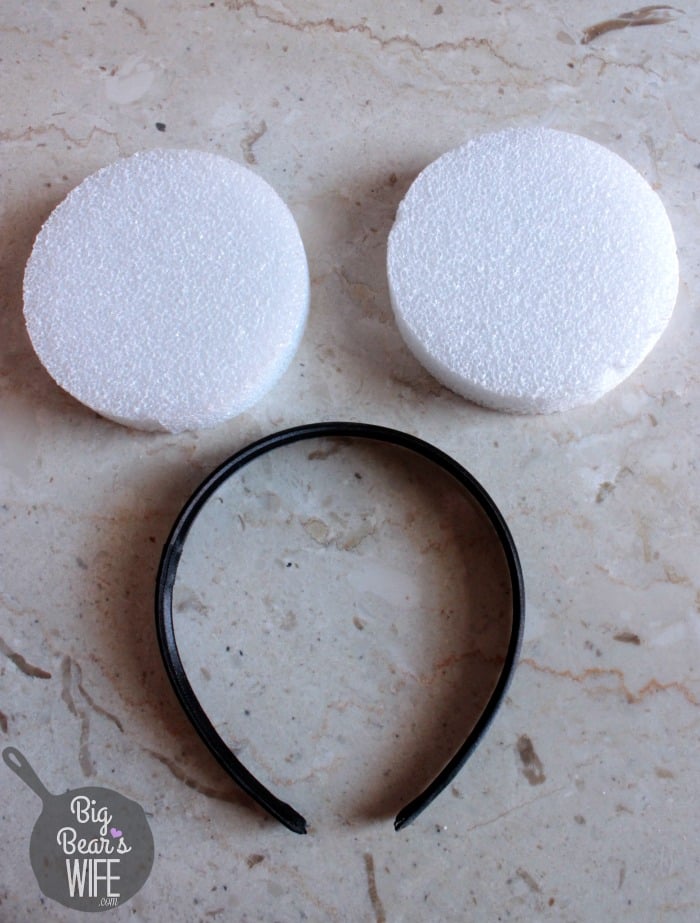
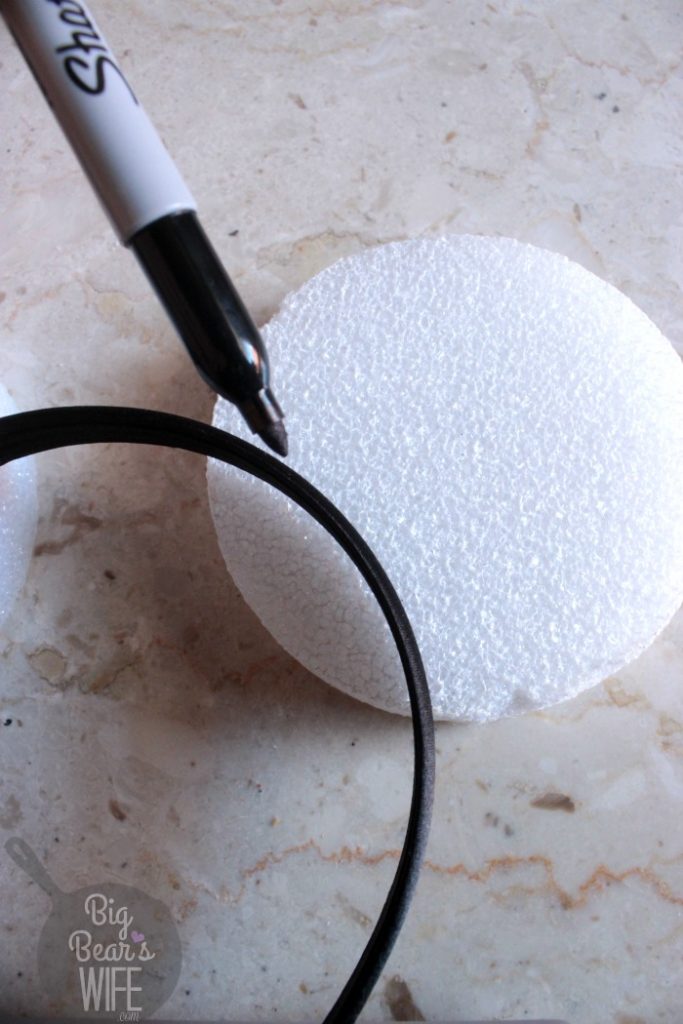
What you’re going to want to do first is to measure your ears and figure out where you want them on the head band. REMEMBER that when you put the headband on your head that it is going to stretch out and the ears are going to go towards each other so make sure you don’t make them too close.
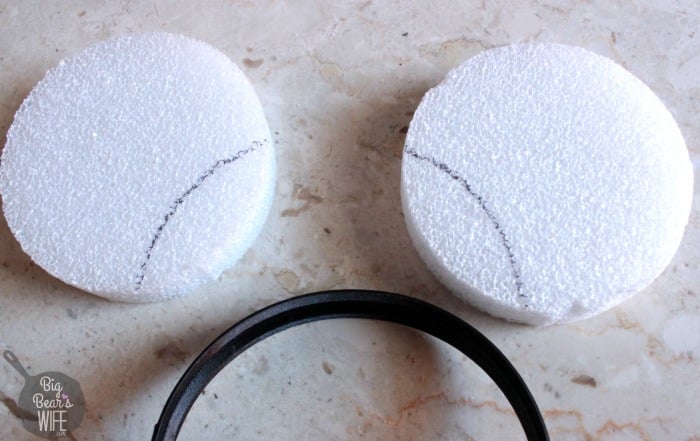
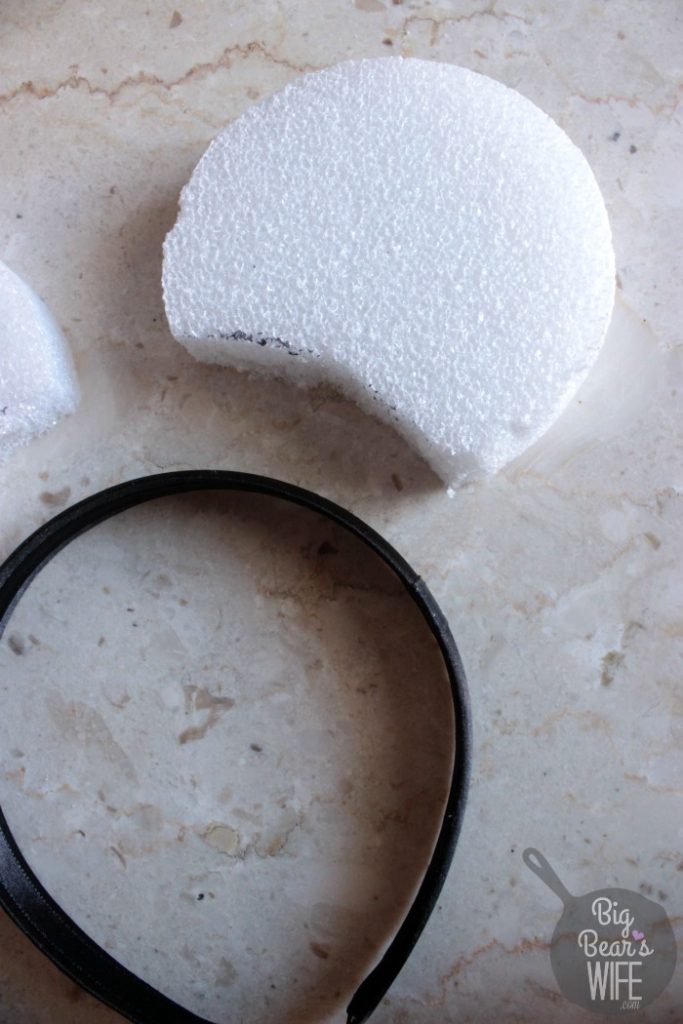
I lay my styrofoam discs out and use a sharpie to mark where I want them to be on the headband with the headband on top of them.
Once you’ve marked your styrofoam discs (or ears), you’ll know exactly where to cut. Use the scissors to cutoff the inner part of the styrofoam discs.
Lay the fabric on a flat surface and flip it so that the side you want to show is face down. You want to mark on the side that won’t show.
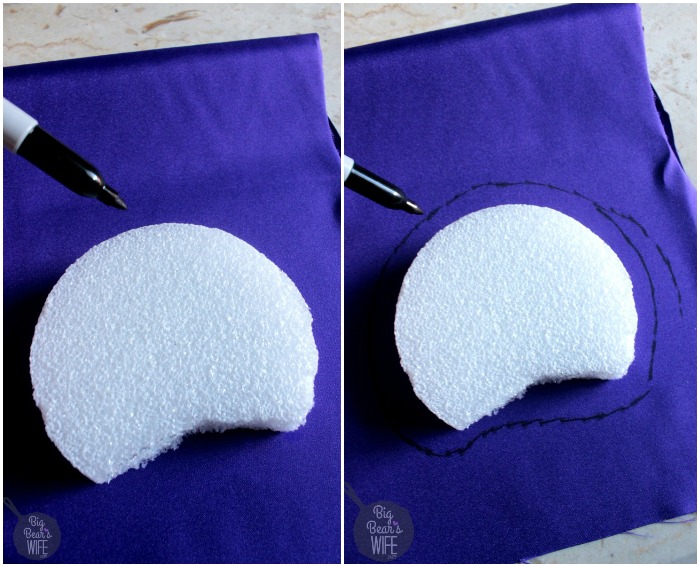
Trace the styrofoam discs with a sharpie on the fabric around the styrofoam discs but leave a little space between the styrofoam discs and the outline. Maybe leave about 1/2 and inch or 1/4 of in inch.
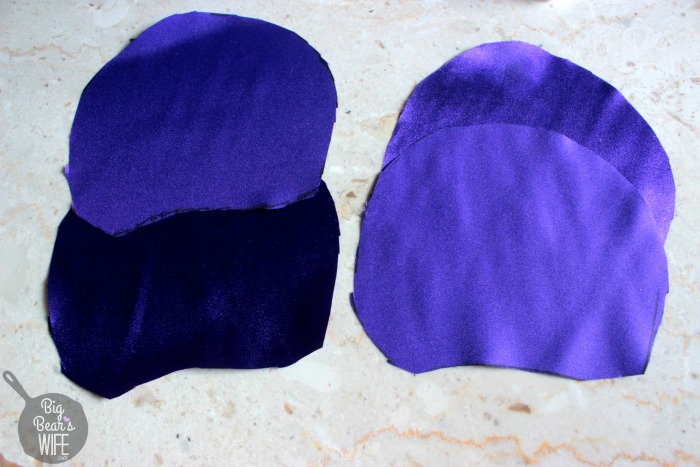
Cut the ears out of the fabric. You’ll need 2 sides for each ear.
Flip the fabric so that the “good side” is on the inside and pin it together. You’ll want to good side on the inside right now because you’ll be flipping it inside out later.
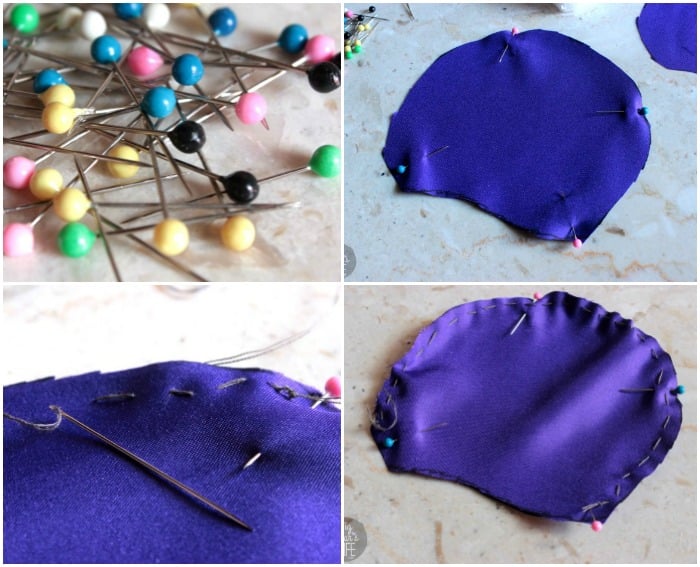
Now once you have it pinned, sew around the round part of the ear but leave the bottom open. Tie off the thread when you’re done. Don’t sew too close to the opening or you won’t be able to get the styrofoam disc in it later.
Remove the pins and flip the fabric inside out. Now the good side will be out.
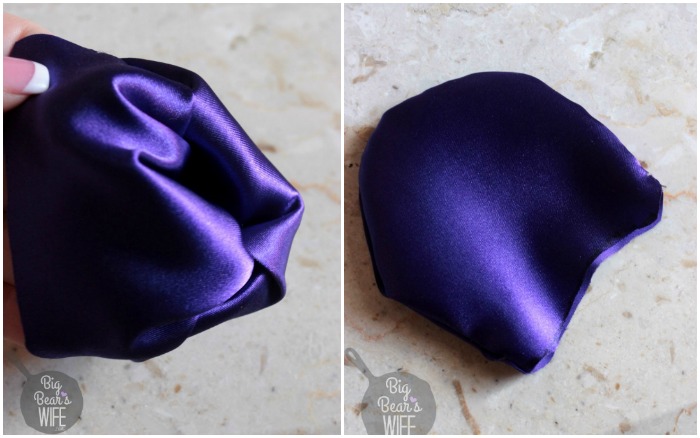
Now slip the styrofoam disc into the fabric ear. It will take a bit of pulling and wiggling to get the styrofoam disc into the fabric ear.
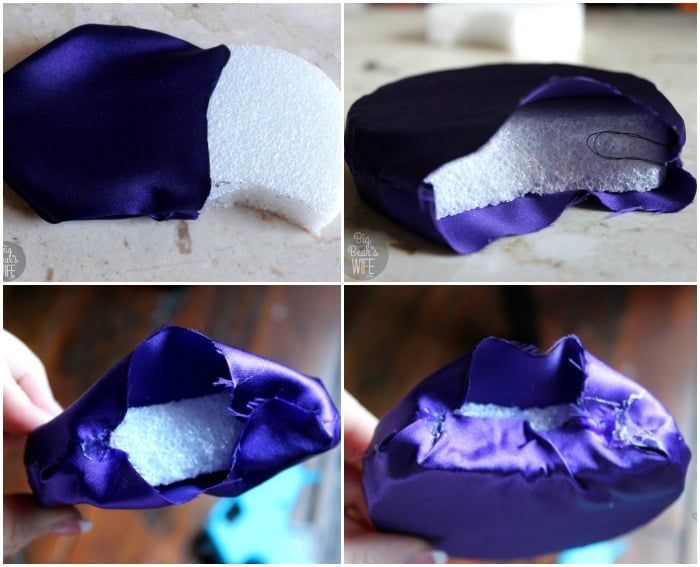
Fold the bottom over and hot glue both flaps so that it lays down flat.
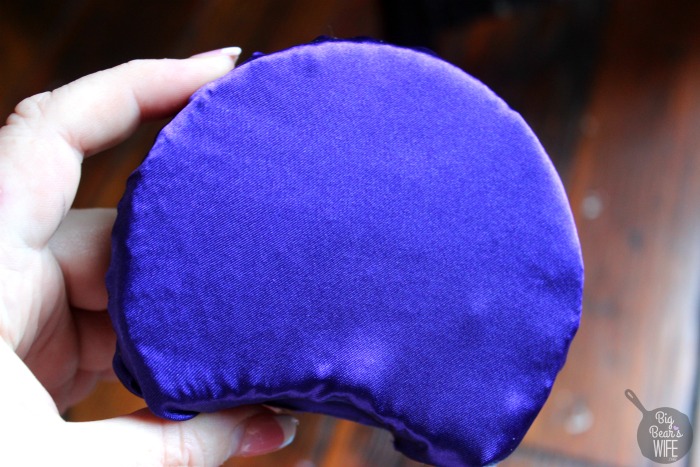
Now you have an ear! Now do the same process for the second ear.
Now one you have both ears done, it’s time to mark them on the headband.
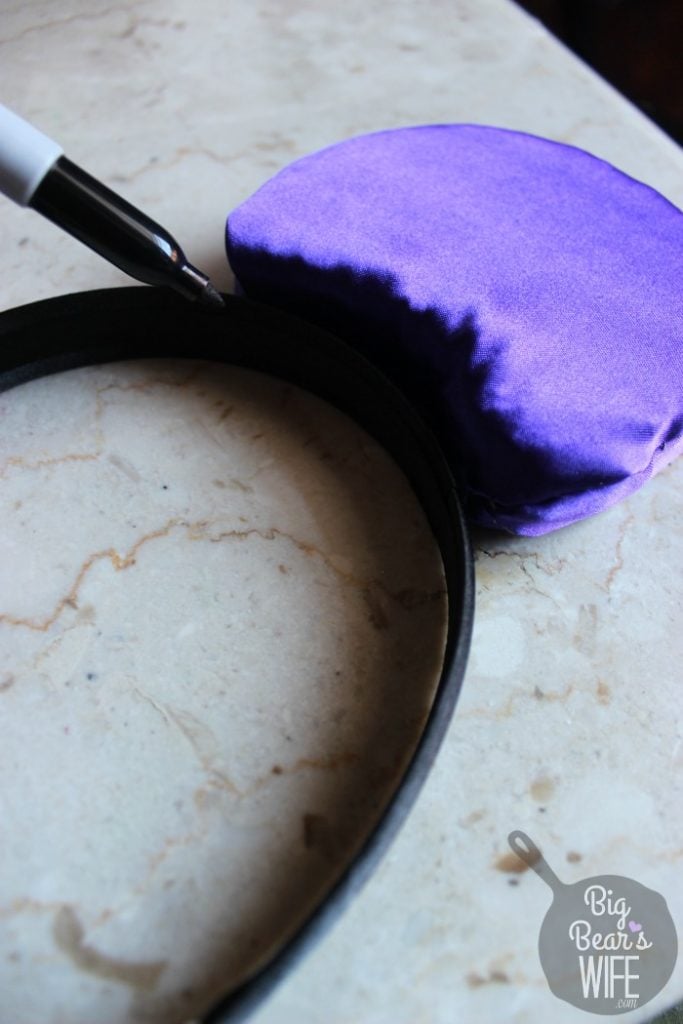
Use the sharpie to mark them where you want then to sit on the headband. Remember, like I said earlier, when you put the headband on your head that it is going to stretch out and the ears are going to go towards each other so make sure you don’t make them too close.
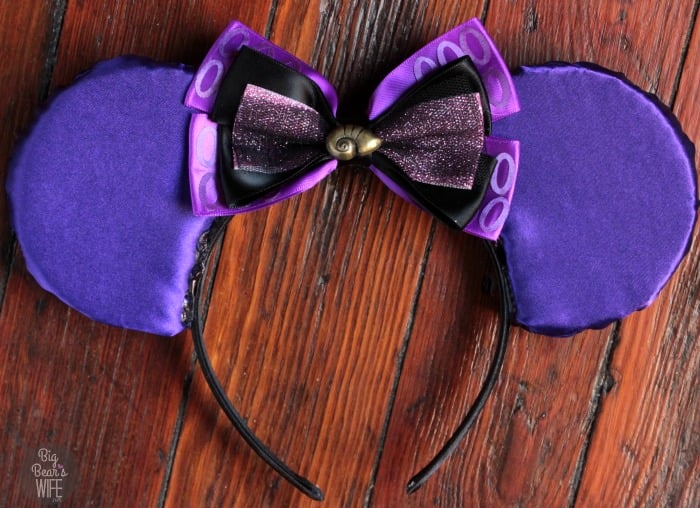
Mark the headband with the sharpie and then hot glue the ears onto the headband. Hold them for about 30-45 seconds until the glue dries.
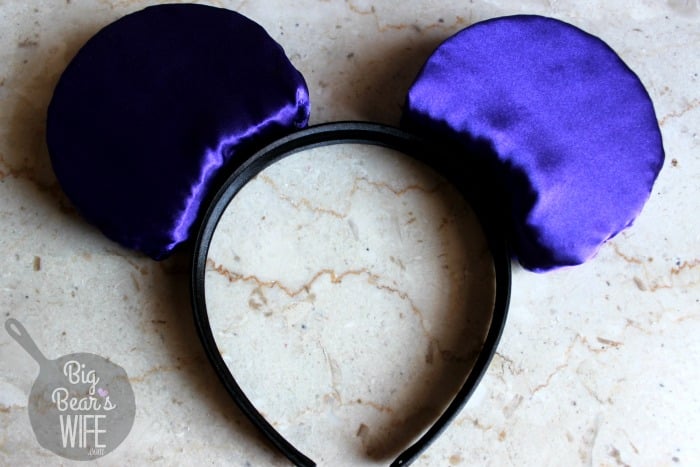
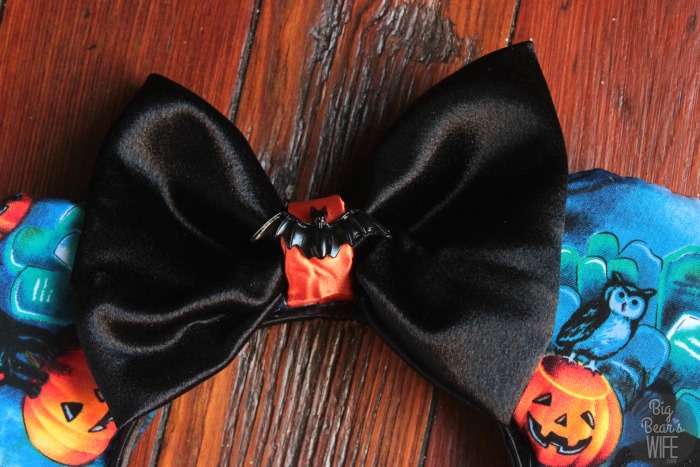
Next, hot glue the bow onto the ears and the headband. Hold the bow for about 30 seconds until the glue dries.
TADA – Ursula Mouse Ears!!!
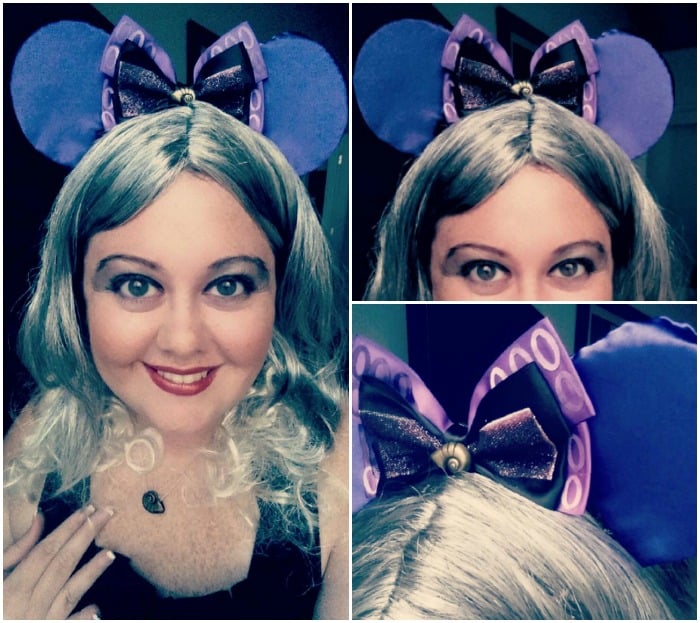
All done and ready for your Ursula costume….or you know, just to wear at Disney World. haha
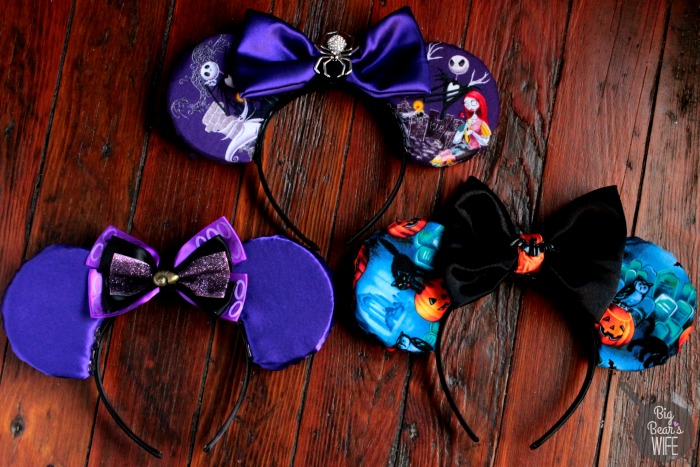
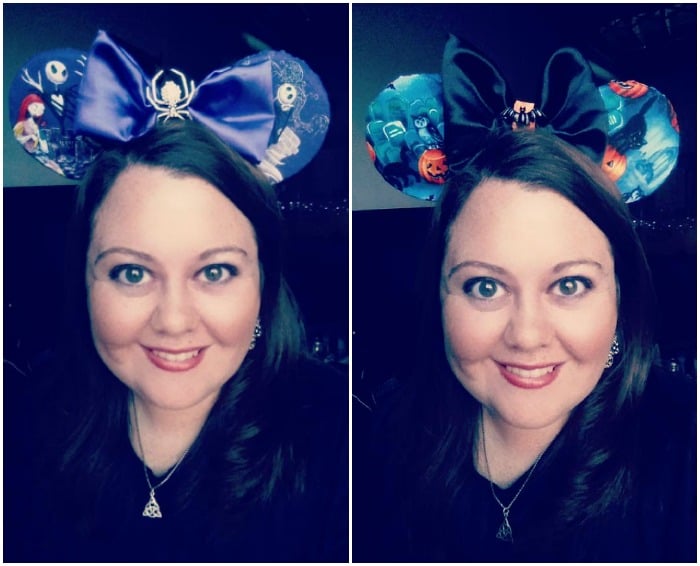
These are all of the mouse ears that I made for our trip this year.
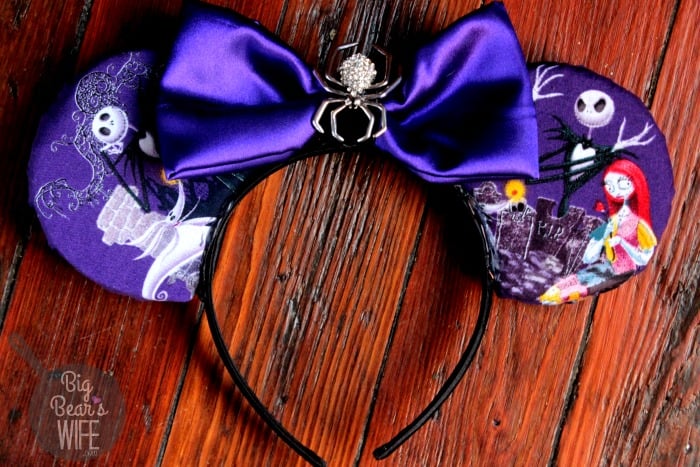
Here are the Jack and Sally mouse ears that I made. Even though I won’t be wearing these for the Halloween party I still had to have them. I love The Nightmare Before Christmas and I knew that these had to make an appearance.
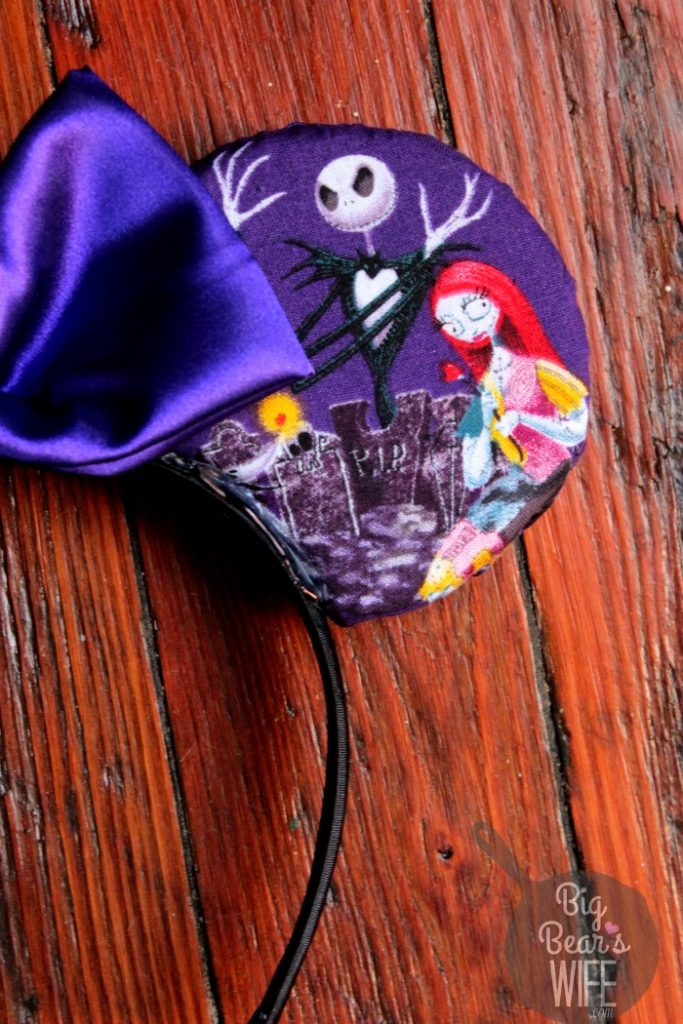
I found the Jack and Sally fabric at JoAnne’s Fabrcis but I’m sure you can find it online too.
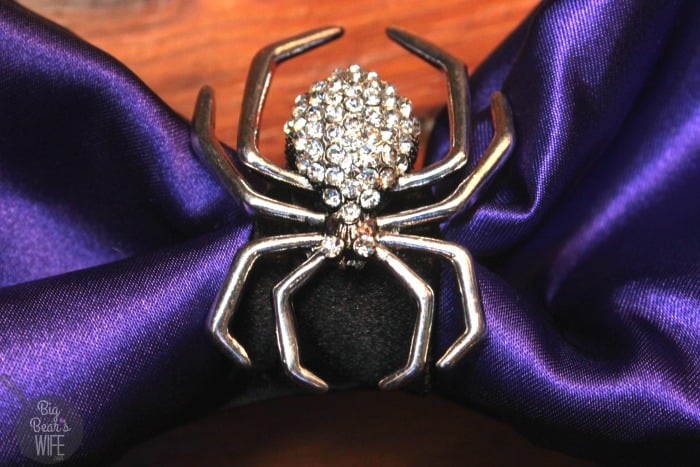
I used this spider charm from Hobby Lobby for the center of my bow.
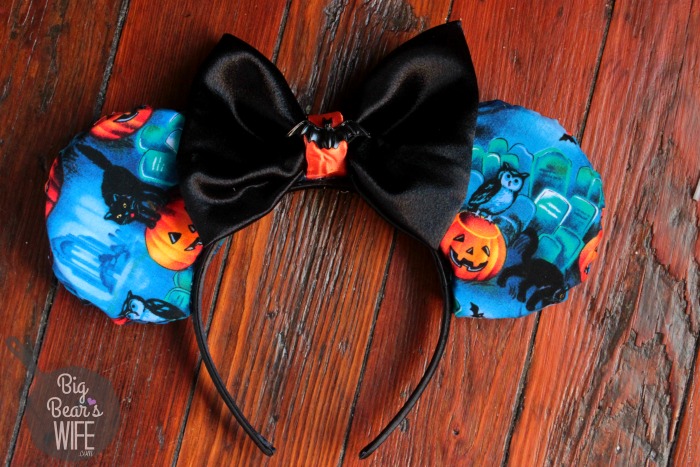
Oh my and this is my last set of ears for the trip.
These little pumpkin and black cat ears will probably make an appearance when we go to Animal Kingdom..maybe………
Other than the Ursula Mouse Ears that I know I’ll be wearing to the party, I’m sure which days I’ll wear the other ears.
Be sure to follow my Instagram and Snapchat (user name is BigBearsWife) because I’m sure I’ll be posting about the trip there!
If you make Mouse Ears using this tutorial, I’d love to see them!! Happy Mouse Ear Making! See ya real soon!
Happy Haunting! Check out all of the spooky Halloween recipes and crafts on this website!!

These turned out so cute!! I love how polished and finished they look!
Thank you!!
This is awesome!
Cute and easy!
So cute!
Where did you get the headbands and what size are they… I’m having a hard time finding the best headbands to use for ears! Thanks
Hey Robyn! I found these at Hobby Lobby. They didn’t have a size on them, I just tried them on in the store to make sure they fit my head. I know a lot of people order them from amazon though!
What size are your styrofoam discs?
The ones I use are a little bigger or about the same sizeish as the palm of my hand. I’ll try to get them out this weekend and measure them. I didn’t put a size because there are so many different sizes, some might look better on others and some people might want bigger or smaller ears.
Just love all the Mickey ears. Going to Disney in September and would love to make my own ears. The material you used with the tombstones, cat and pumpkin is the best. Can you tell me where it was purchased? Thankyou
I found it at JoAnns!
These are super cute!!! Where did you find the shell for the center of your bow on the Ursula ears?
Thank you!!! I found that Ursula bow at Hot Topic 🙂 (it already at the shell on it)