


function printDiv(e){var divToPrint=document.getElementById(e);newWin = window.open(“”, “printwin”); newWin.document.write(divToPrint.innerHTML); newWin.print(); newWin.close(); }
#therecipewiz {width:95%; padding:8px;} #therecipewiz{border:#E1E1E1 solid thin;}#therecipewiz #printbutton{float:right; cursor:pointer; margin:-8px 0px 0px 0px;} #therecipewiz #rechead img{float:left; margin:0px 8px 0px 0px;}#therecipewiz #recbody{padding:0px 30px 0px 30px;}#therecipewiz div.title{ font-size:18px; font-weight:bold; margin:5px 0px 1px 0px; padding:0px;}#therecipewiz div.byline{ font-size:12px;}#therecipewiz div.subtitle{ font-size:16px; font-weight:bold; margin:10px 0px 5px 0px;}#therecipewiz div.summary{font-style:italic; font-size:14px; margin:5px;}#therecipewiz .ingredient{ /*width:46%; float:left;*/ display:block; margin:5px 0px 5px 15px;}#therecipewiz .instruction{ margin:5px 0px 5px 15px; display:block;}#therecipewiz .time{ margin:5px 0px 5px 15px; display:block;}#therecipewiz .clear{clear:both}
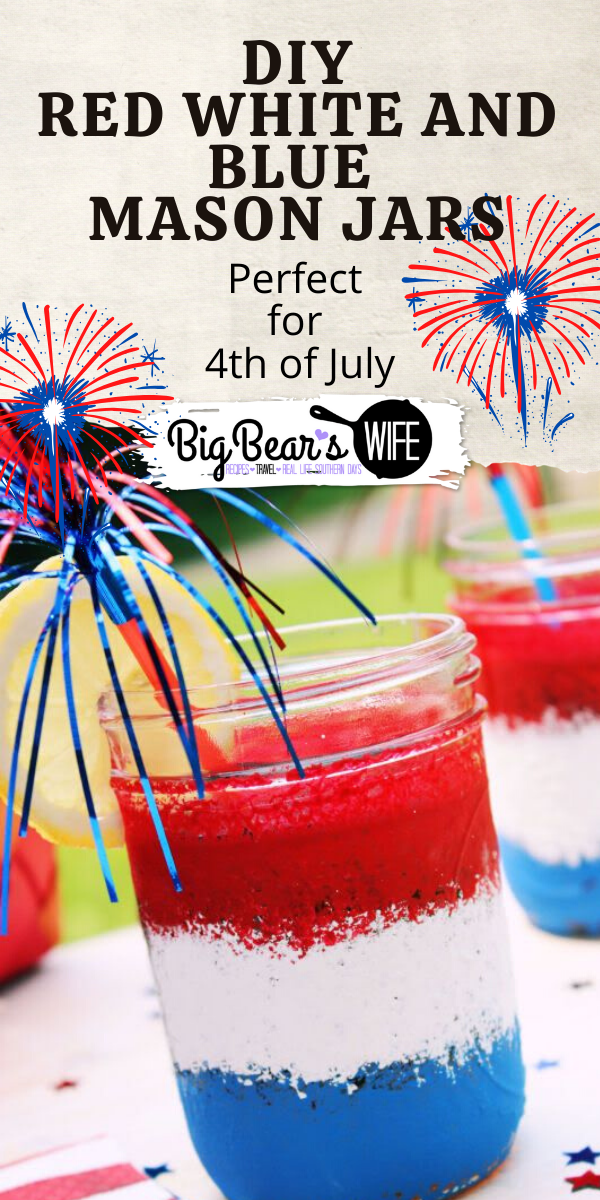
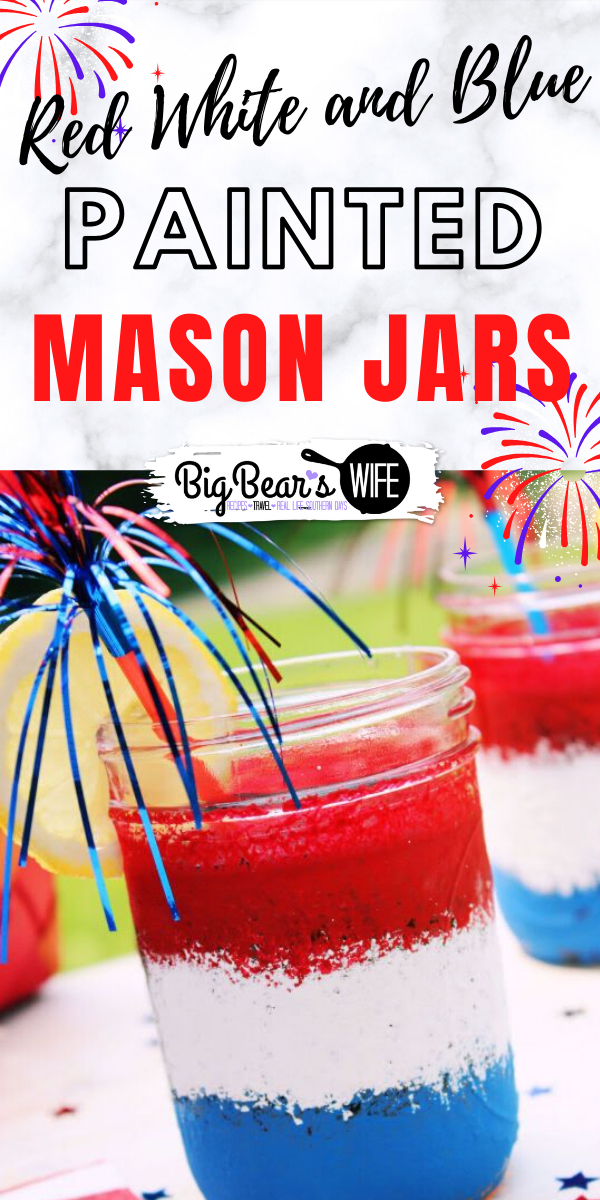
- Mason Jars
- Red Acrylic Paint
- White Acrylic Paint
- Blue Acrylic Paint
- Chalkboard Paint
- 1 Craft Sponge, cut into 3 pieces
- 1 foam brush
- Chalk
Starting at the bottom for the jar. Blot a ring of blue paint around the lower section of the jarwith the sponge. Let Dry.
Next blot a ring of white paint around the middle section of the jar with the sponge. Let Dry.
Then blot a ring of red paint around the lower section of the jar with the sponge. Let Dry **DO NOT paint on the rim or lip of the jar, do not paint where your mouth will touch the glass**
For the chalkboard label. Paint a oval or square onto the front of the jar, with the chalkboard paint. Should take 2 coats to cover. Let Dry.


Leave a Comment