
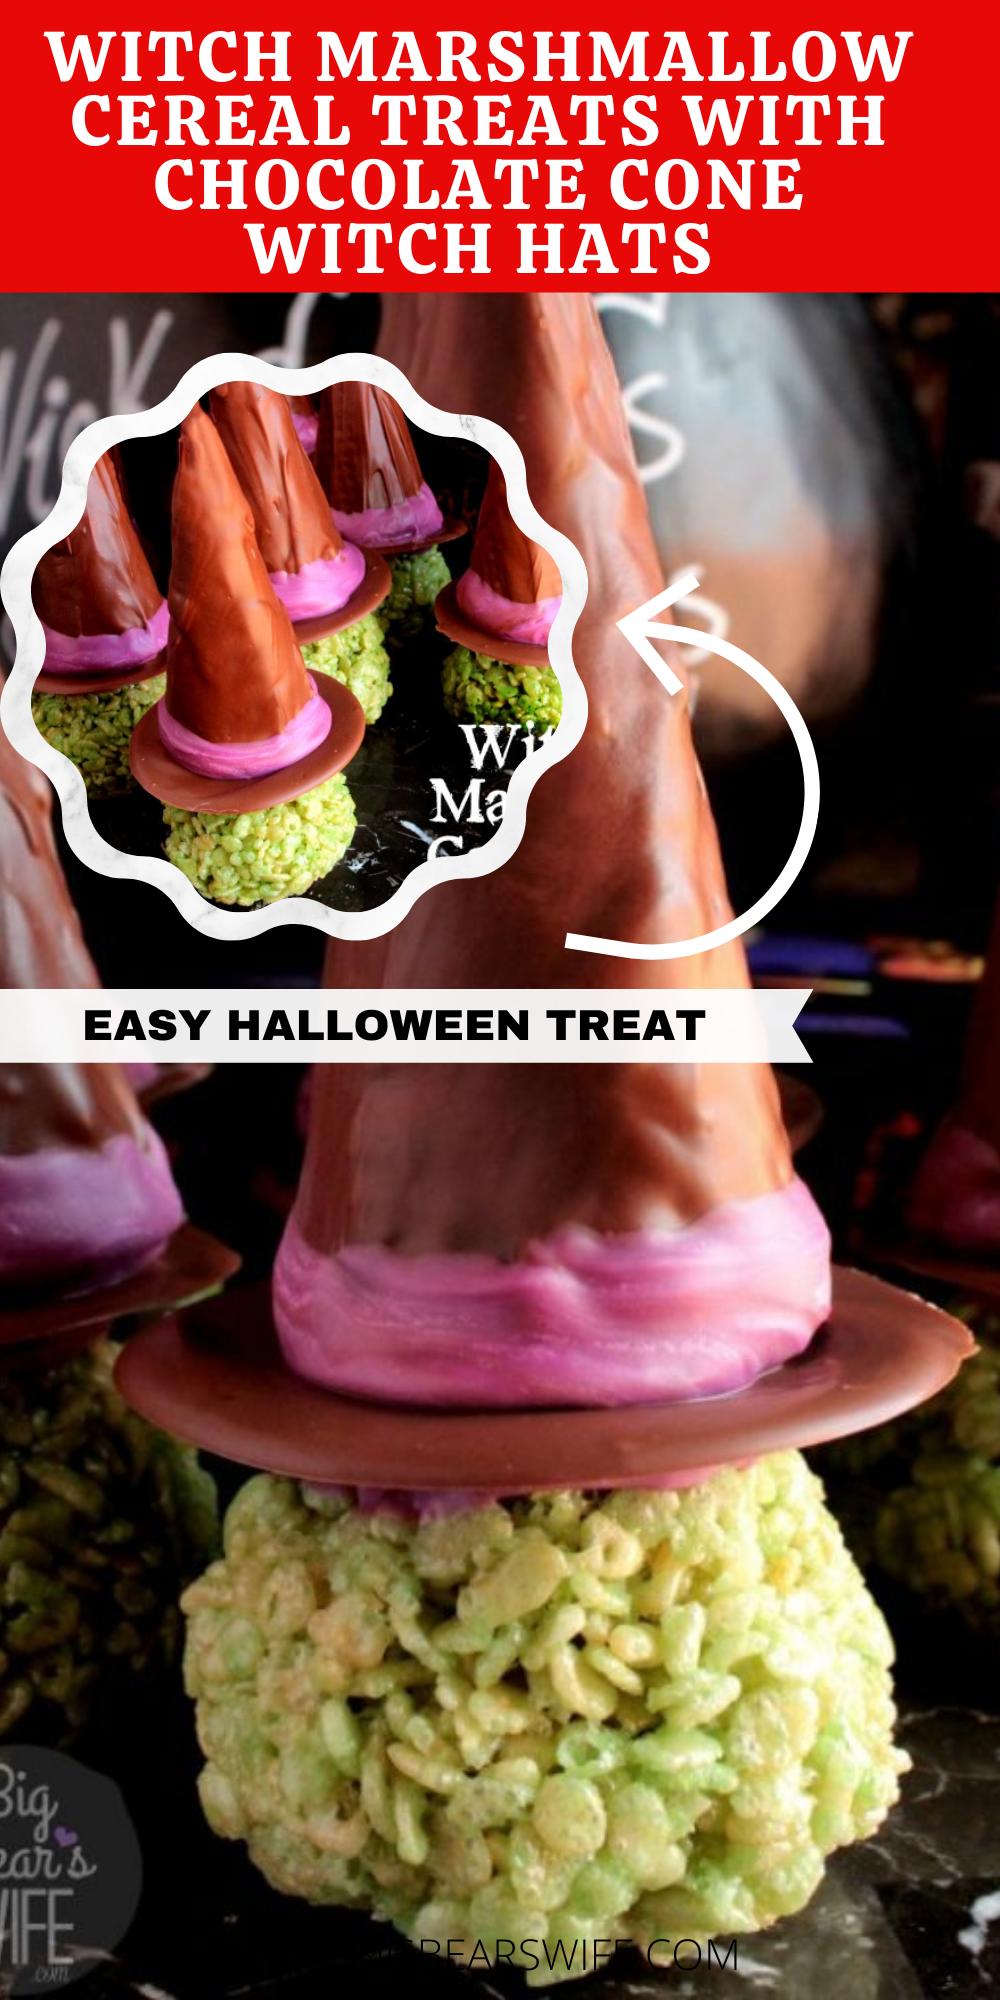
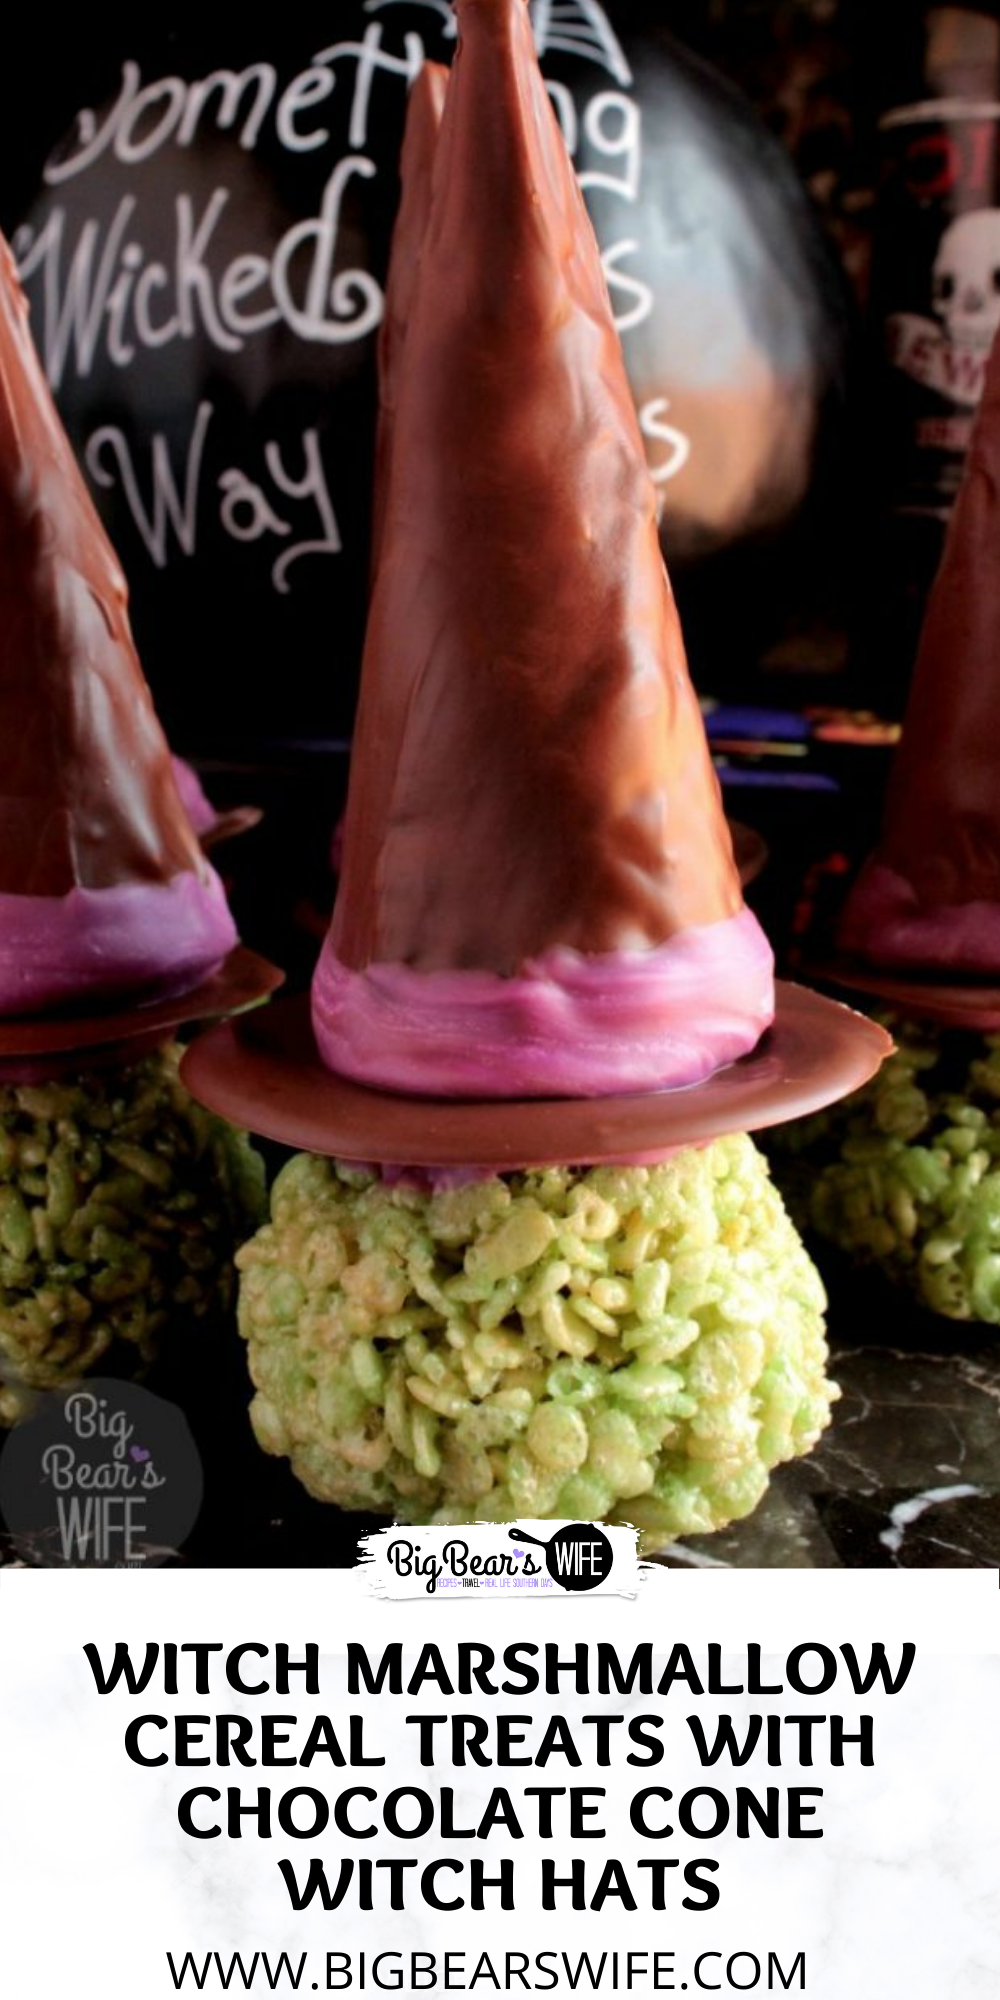
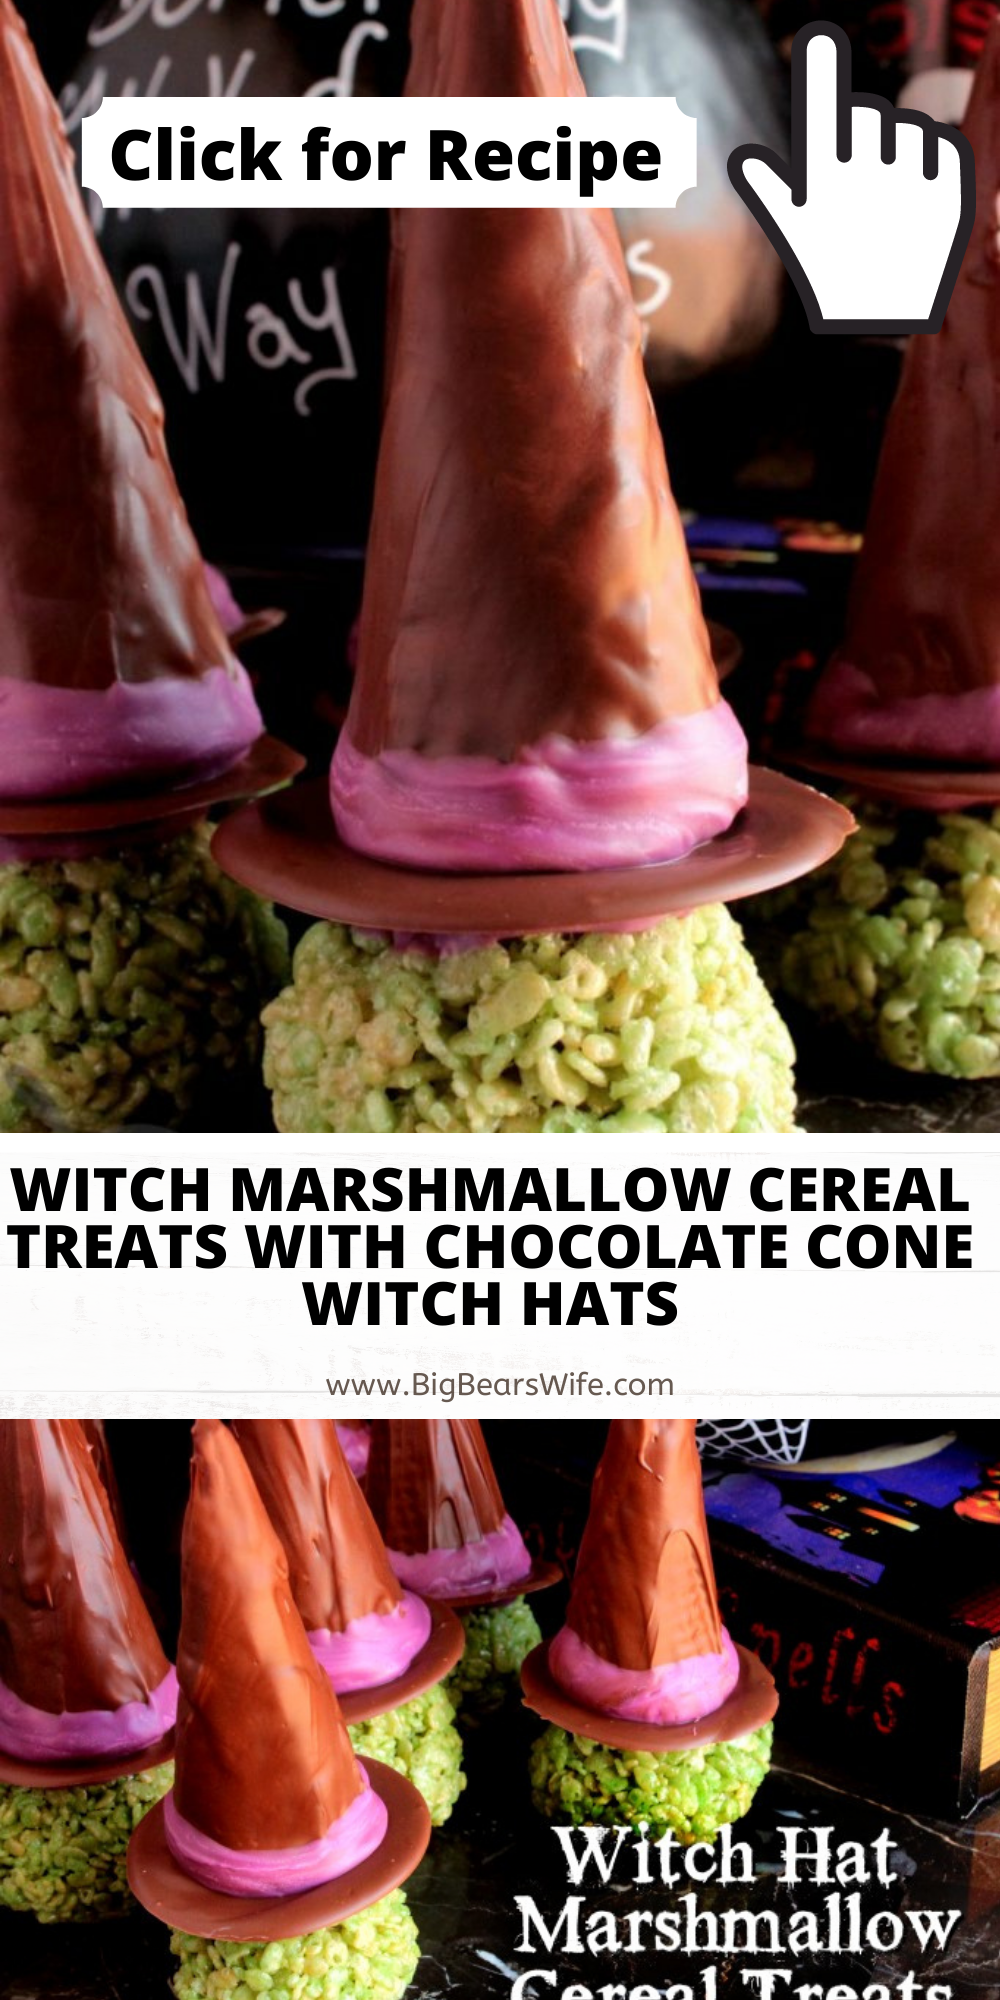
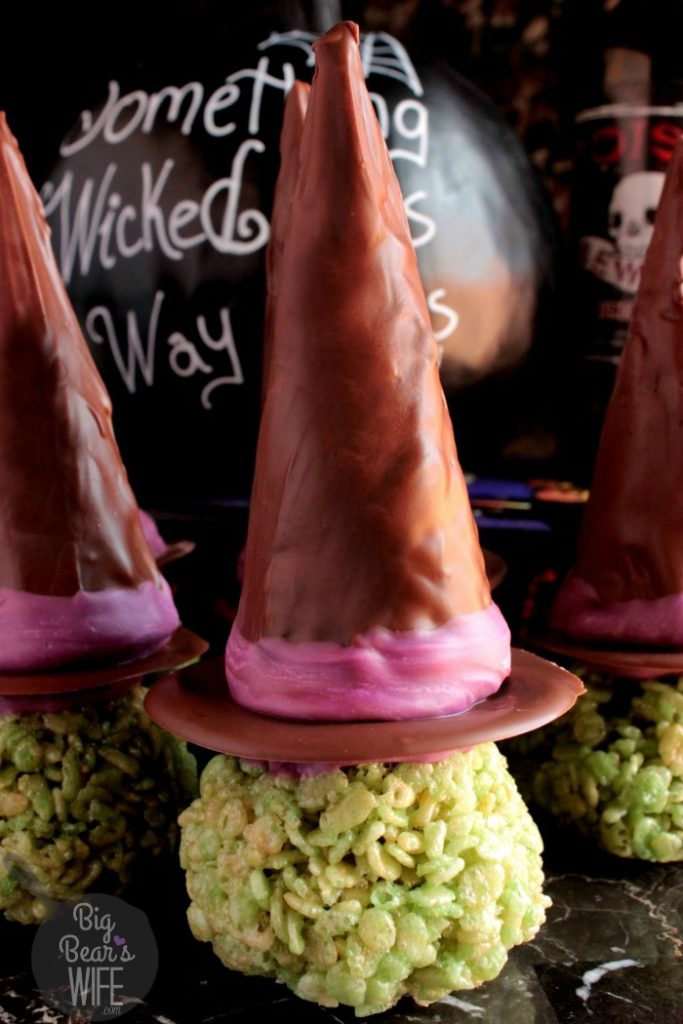
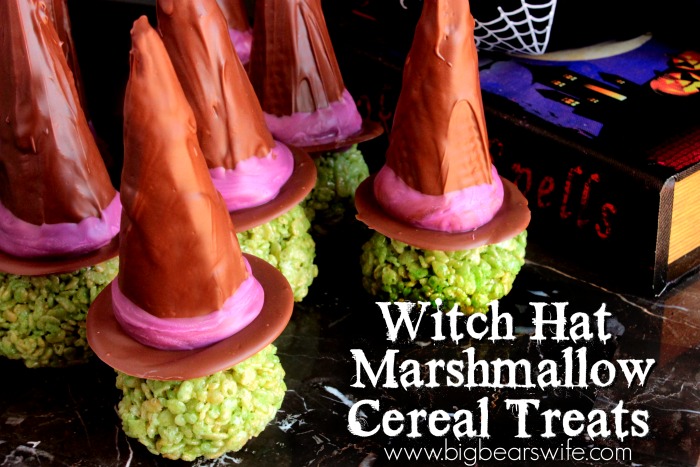
Ready for a spooky treat that’s sweet to eat? These Witch Marshmallow Cereal Treats with Chocolate Cone Witch Hats have Halloween written all over them! Enjoy them at home or give them out as treats!
Apartment living has it’s perks. I never thought that I would like living in an apartment until we moved downtown, now I love it! One of my favorite parts about living in the apartment is the fact that I have amble amounts of taste testers within feet of my front door. haha.
If you live in my apartment building (and we know each other haha) there is a good chance that you’ll randomly find bags of homemade treats tied to your door knob through the year.
The latest treat to be packed up and hung with ribbon onto door knobs? These Witch Marshmallow Cereal Treats with Chocolate Cone Witch Hats!

While I’m working on recipes in the kitchen and coming up with lots of fun Halloween treats for y’all I still have a no waste policy in the back of my head. I have no desire to make food and then toss it. I also have no desire to make a dozen Witch Marshmallow Cereal Treats and eat them all myself. haha so that’s where the apartment building comes in. 🙂
After making these and photographing them for the blog, I packed them up in little bags with ribbon and hung them on a few apartment doors before going out for the evening.
Let’s just say that we had some pretty excited neighbors when we got home.
I wish that you and I were neighbors because I would totally share with you but since that’s not the case, I’m going to show you how to make your own at home.
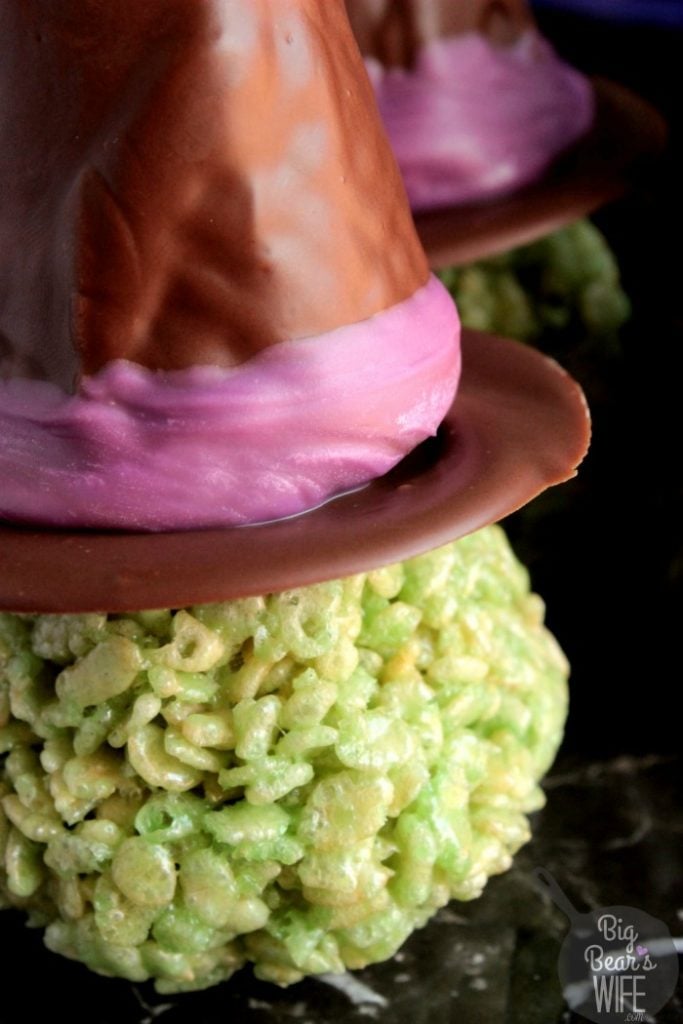
Let’s start with the witch’s hat. You’ll need sugar cones (not giant waffle cones), chocolate candy wafers (like the ones you get from the baking store or the craft store) and purple chocolate candy wafers (or whatever color for the hat’s trim).
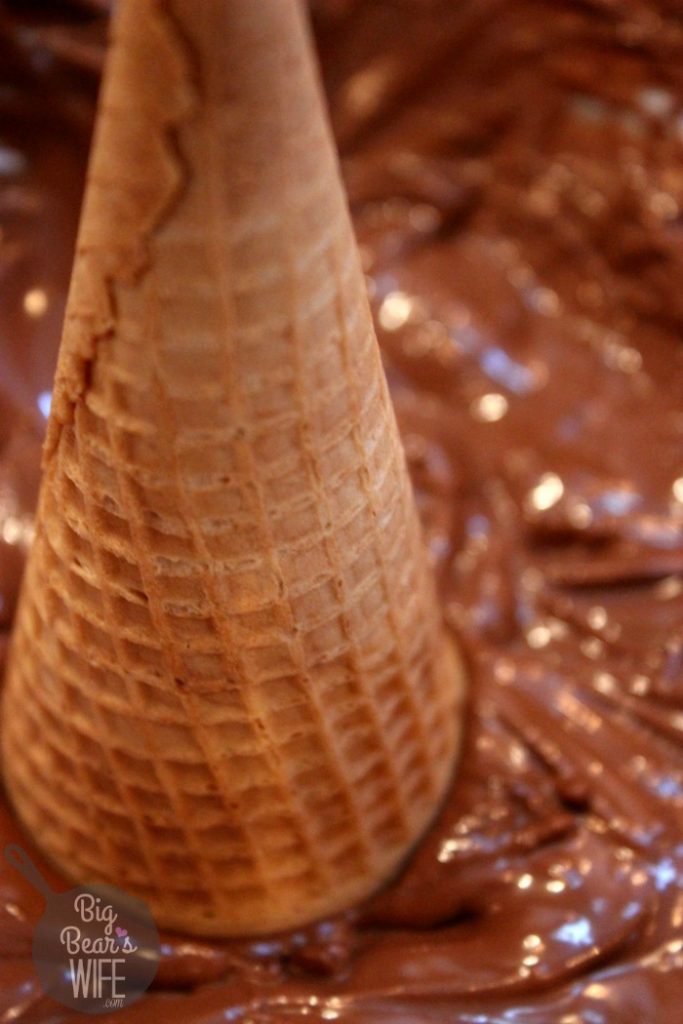
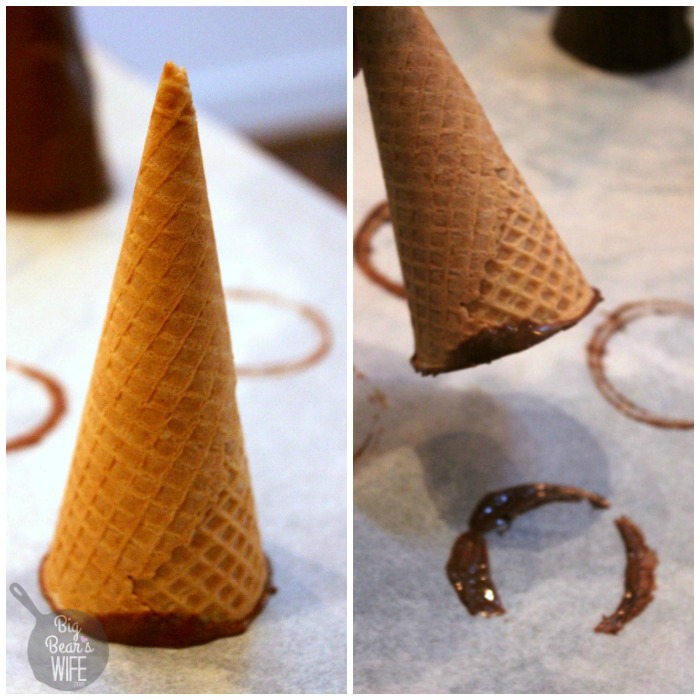
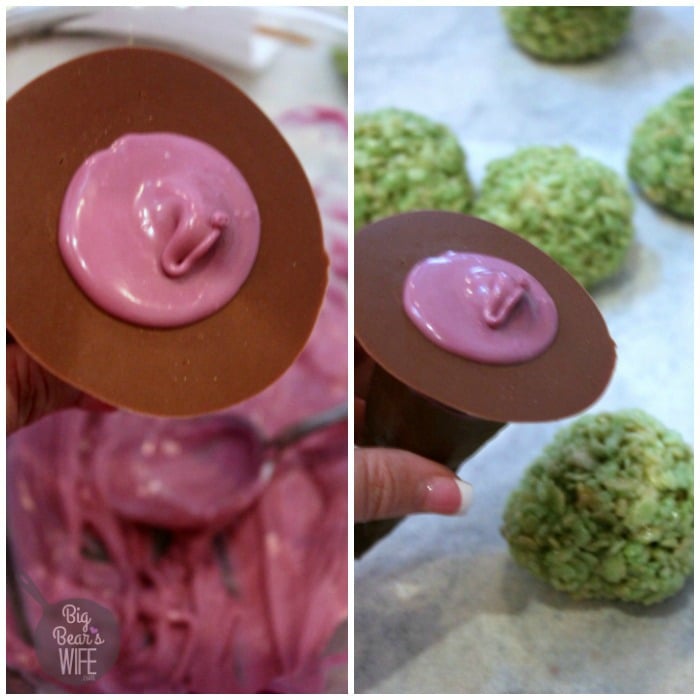
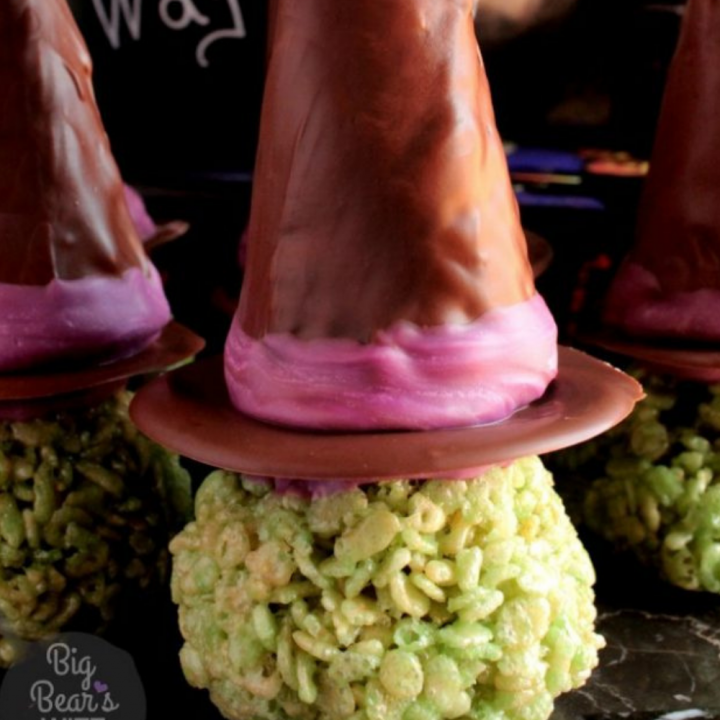
So first let’s make the rim for the hat. Melt the chocolate wafers according to the directions on the bag. Once the chocolate is melted, lay out a piece of parchment paper and dip a sugar cone into the melted chocolate. Use the sugar cone and press it onto the parchment paper to make a circle. This will be your outline for the hat rim.
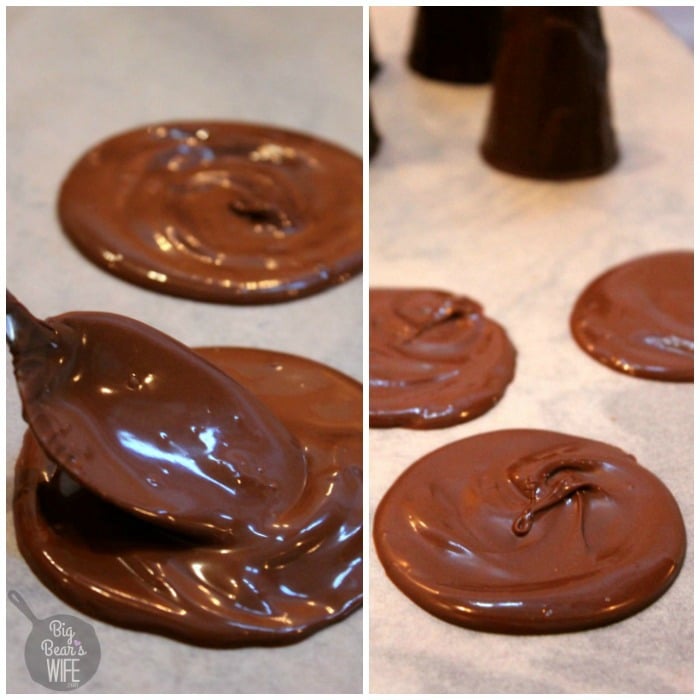
Next, take a spoonful of the melted chocolate and spoon it onto the circle stencil. Use the back of the spoon and spread the circle out until it gets as large as you’d like. Let the chocolate cool and harden. Do this and make as many rims as you’re going to make hats.
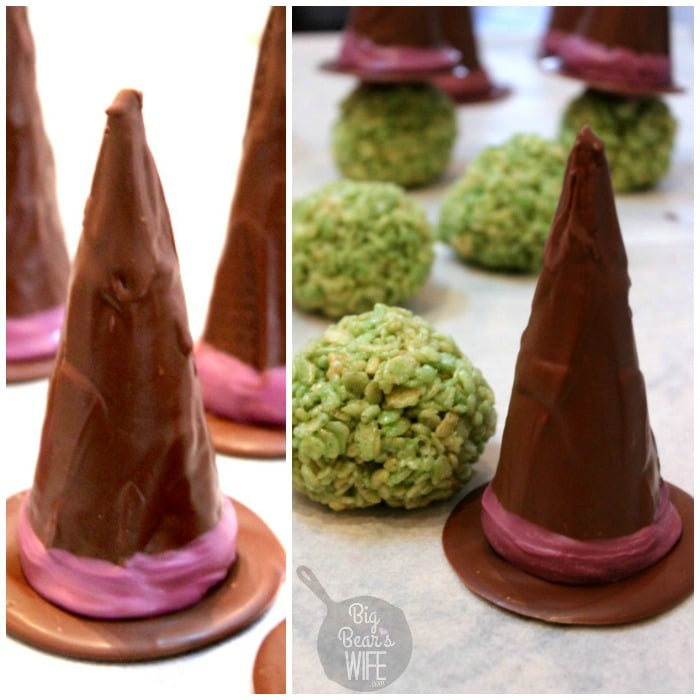
Next, dip the sugar cones into the melted chocolate. Use the back of a spoon to help spread the chocolate over the cone. Sit the cones on the wax paper to cool and harden. Once the chocolate is hard, melt the purple candy melts according to the package directions.
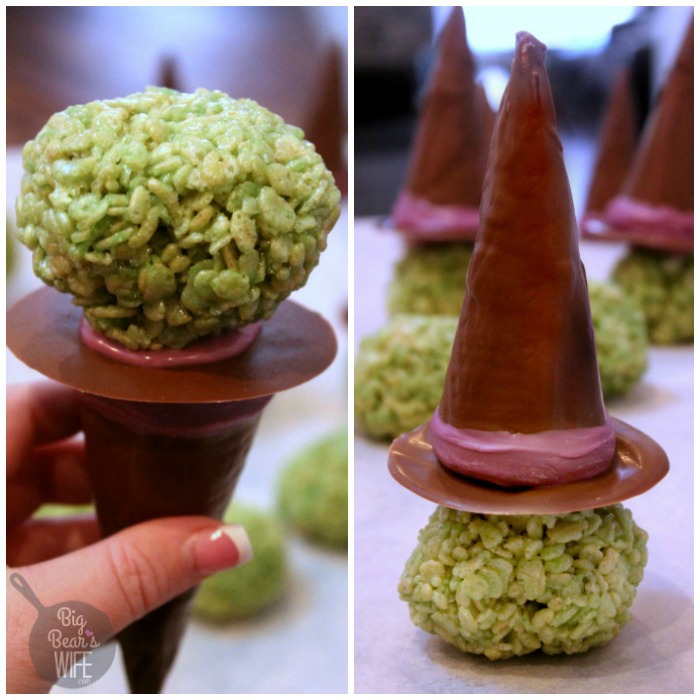
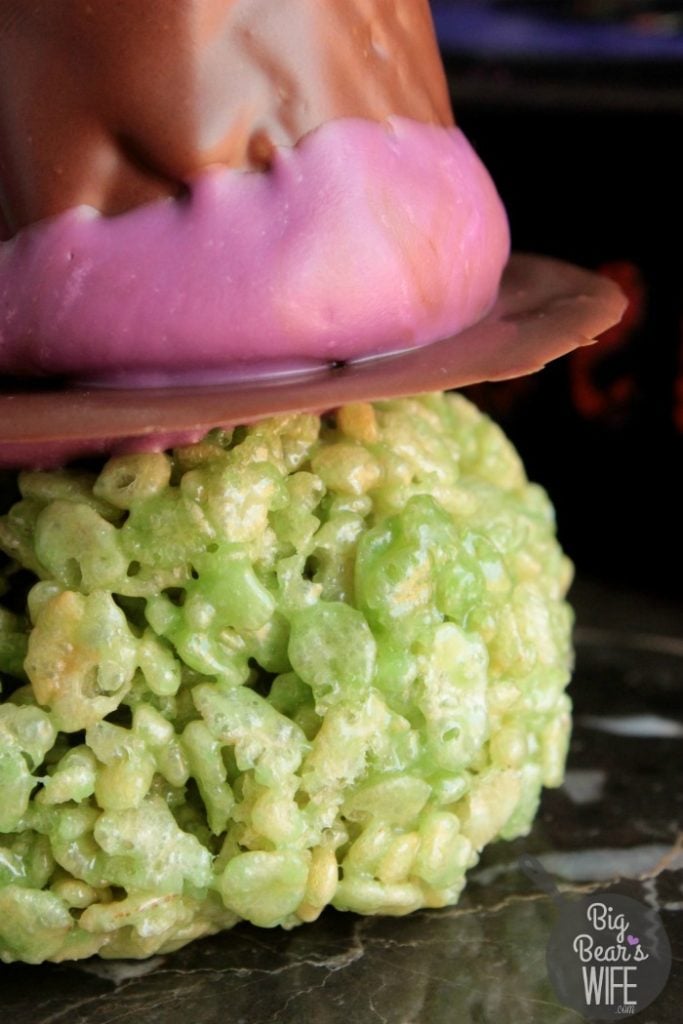
Dip each cone into the purple chocolate and then press each one down onto one of the chocolate circles. Let dry completely.
While the hats are drying, making the marshmallow cereal treats.
Follow the recipe below and then let the treats cool.
Once you’re ready to assemble. Use a little melted chocolate as glue and attach a “witch head” to each witch hat. Set aside and let chocolate harden.
That’s it! After that, you’ll have a whole batch of Witch Marshmallow Cereal Treats with Chocolate Cone Witch Hats ready to be devoured…..or ready to be handed out as treats. Either Or. 😉
You could even fill the cones with M&MS and other candies if you wanted too (you know, before you put the rims on to close them up!) that would be neat!
These were a huge hit with the adults and kids in our apartment building! Hope y’all will like this just as much!
Happy Haunting! Check out all of the spooky Halloween recipes and crafts on this website!!
Witch Marshmallow Cereal Treats with Chocolate Cone Witch Hats
Witch Marshmallow Cereal Treats with Chocolate Cone Witch Hats
Ready for a spooky treat that's sweet to eat? These Witch Marshmallow Cereal Treats with Chocolate Cone Witch Hats have Halloween written all over them! Enjoy them at home or give them out as treats!
Ingredients
FOR WITCH HATS
- 14 sugar cones (not giant waffle cones)
- 24 ounces chocolate candy wafers
- 2 cups purple chocolate candy wafers (or whatever color for the hat\'s trim)
FOR WITCH HEADS
- 1 box rice krispie cereal (12 oz or 14 oz)
- 20 ounces marshmallows
- 6 tablespoons butter
- green food coloring
Instructions
FOR WITCH HATS
Melt the chocolate wafers according to the directions on the bag.
Once the chocolate is melted, lay out a piece of parchment paper and dip a sugar cone into the melted chocolate. Use the sugar cone and press it onto the parchment paper to make a circle. This will be your outline for the hat rim. Do this 7 times with space in between.
Next, take a spoonful of the melted chocolate and spoon it onto the circle stencils.
Use the back of the spoon and spread the circle out until it gets as large as you\'d like.
Let the chocolate cool and harden. Do this and make as many rims as you\'re going to make hats.
Next, dip the sugar cones into the melted chocolate.
Use the back of a spoon to help spread the chocolate over the cone.
Sit the cones on the parchment paper to cool and harden.
Once the chocolate is hard, melt the purple candy melts according to the package directions.
Dip each cone into the purple chocolate and then press each one down onto one of the chocolate circles. Let dry completely.
While the hats are drying, making the marshmallow cereal treats.
FOR WITCH HEADS
Melt the butter in a large pot over medium heat.
When the butter is melted, add in the marshmallows. Stir until completely melted and smooth.
Stir in a few drops of green food coloring.
Stir in the rice puff cereal.
Stir well until everything is combined.
While it's still warm, butter your hands and scoop out some of the cereal to make a ball a little smaller than your fist. Roll into a ball and place it on the parchment paper to cool.
Once you're ready to assemble. Use a little melted chocolate as glue and attach a "witch head" to each witch hat. Set aside and let chocolate harden.
All hail the halloween queen!! Girl, your spooky treats never disappoint!
These are so darn cute!! Love cute Halloween treats. Yum!
Angie! These are too cute! But then again, what else would I expect from the Halloween queen!
The cutest idea, EVER! Love this and wish you were my neighbor…well, my kids would be super duper excited to get surprise treats from you!!!
I LOVE these!! They are too cute!!
Oh my gosh! What a clever idea for Halloween! 🙂
Oh, to be your neighbor! Seriously, that is such an awesome thing to do…and these are so adorable.
How cute are these?! Perfect for all the Halloween parties!
I so wish I knew my neighbors so I could do the same! The two of us have to eat everything. 🙁
And these are so darn cute! And tasty looking.
Such a cute sweet treat for Halloween!
What a fun Halloween treat for the kiddos
These are so fun, love it!
These are brilliant Angie! I think you and Thomas need to move to Philly 😉 My neighbors would adore these lovelies!
These are beyond adorable. What a clever treat for Halloween… I can see why they were such a huge hit!