• Skip to primary navigation
  • Skip to main content
  • Skip to primary sidebar
Big Bear's Wife

Big Bear's Wife

Easy Recipes, Fun Travels, & Real Life Southern Days

  • Home
  • About Me
    • Media/PR
    • Contact Me
  • Recipe Index
  • Subscribe
Big Bear's Wife
  • Facebook
  • Instagram
  • Pinterest
  • RSS
  • Twitter
  • Home
  • About Me
    • Media/PR
    • Contact Me
  • Recipe Index
  • Subscribe
  • Facebook
  • Instagram
  • Pinterest
  • RSS
  • Twitter
Home » Desserts » Cakes » Halloween Petit Fours and Homemade Marshmallow Fondant

Halloween Petit Fours and Homemade Marshmallow Fondant

October 12, 2011 *This post may include amazon links. As an Amazon Associate, I earn from qualifying purchases.

Pin
Share
Tweet
177Shares

Halloween Petit Fours and Homemade Marshmallow Fondant are super easy no bake Halloween treats that you’ll love making for your party!

Halloween Petit Fours and Homemade Marshmallow Fondant


Halloween is one of my favorite holidays. It’s in a close run for first place with Christmas. Something about the colors and decorations make me fall in love with it.
Also I think I  love it because for one day, I can dress up and be someone totally different, put bright colored highlights in my hair (like purple, green, orange.. haha), and no one looks at me like I’ve gone crazy.
I mean what other day of the year can you dress up like a vampire, with fangs (the cool real looking ones), and spray tons of glitter in your hair and not look like a freak….Halloween.. It’s the only time..I think..
I’ve been playing around with the idea of Halloween treats, and wanted to try to make Halloween Petit Fours.   Petit Fours are mini cakes. Sometime they are frosted, sometimes covered in fondant.
I worked for a while, trying to make these little cakes. I  read blog after blog, and drew sample pictures of what I’d make, and thought and thought of what kind of cake I’d use.
But these little cakes have to be dense in order to work. Something along the lines of pound cake, so I’ve read. I didn’t know that. I baked a regular chocolate cake in a rectangle cookie sheet (the kind with sides) to get a small flat cake, I figured that they would be the prefect height, and that I’d just need to cut them into squares. The cake was to moist.  It fell apart when I tired to cover the little squares in fondant.
So I did what anyone would do…. I Googled 😉
After searching and reading probably 50 blogs on it, I came across Amanda’s Tutorial for making petit fours on her site i am baker. I’ve visited Amanda’s blog 1,000 times but had never even seen this on her site before. I am so glad I found it though.
Amanda uses OREO cakesters for her petit fours. I would have never thought of that….mainly because I don’t normal venture down that asle of the grocery store, and had only heard of them once. Now that I know about them, I’m sure my house will have a stock pile of them for dessert making 😉

Also Amanda uses pre-made fondant, but I hate hate hate pre-made fondant, and it taste like old playdough. blah.

So I made Homemade Marshmallow fondant (Recipe Below). That way when I serve them, people are not picking off the fondant or decorations and throwing them away. They are actually yummy 🙂


First I’ll share the Marshmallow Fondant Recipe I used and then How to Make the Petit Fours.
Happy Haunting! Check out all of the spooky Halloween recipes and crafts on this website!!
Marshmallow Fondant

(Printable Recipe Here)

What you need:
4 cups of Mini Marshmallows (About 1/2 of a 16 oz bag)
4 cups of powdered sugar (About 1 pound) plus a little extra for dusting
2 tablespoons cold water
What to do:

Place the mini marshmallows and the water in a large microwave-safe bowl.

Microwave on high for 1 minute, until the marshmallows are puffy.

Stir the marshmallows with a rubber spatula until they are melted and smooth.
(if there are some that are unmelted, return to the microwave for 30seconds)

Add the powdered sugar and begin to stir with the spatula.

Stir until everything is mixed or to the point where it is impossible to stir it anymore.

Scrape the fondant out onto a workspace that has been dusted with powdered sugar.

The fondant will be sticky and lumpy, with lots of sugar that has not been incorporated yet.

Dust your hands with powdered sugar, and begin to knead the fondant mixture. You’ll need to work the sugar into the marshmallow with your hands. This will take a little time. Just keep kneading it until it is combined and looks like fondant. It will become smooth and loose all the “stickiness” (add more sugar if necessary)

Roll into a ball, and now it’s ready to use.


Halloween Petit Fours

(Printable Recipe Here)

Will Make 12 Little Petit Four Cakes

What you need:

Oreo Cakesters (My box came in 12 count)
Marshmallow Fondant (or pre-made)
Rolling Pin (I bought a fondant rolling pin at Hobby Lobby)
Powdered Sugar for dusting.
Food Coloring (optional)

(Sorry I didn’t take any pictures while making them, I’m not that cool or talented, but Amanda did when she made her’s)

What to do:

Unwrap the Oreo Cakesters.

Start kneading your fondant to make it workable. (You might want to have a little extra powdered sugar nearby in-case it starts to get sticky from the heat of your hands.

If you want to color your fondant, you’ll want to do that now. I made Orange, Green, and Black for mine.

I used Americolor Soft Gel Paste Food Color. I like the gel food coloring better.

To color the fondant, pull off a chuck of fondant and roll it flat. Drop a few drops of food coloring into the center of the fondant and knead the coloring onto the fondant. (You may want to wear gloves for this if you don’t want your hands to be stained with the coloring).

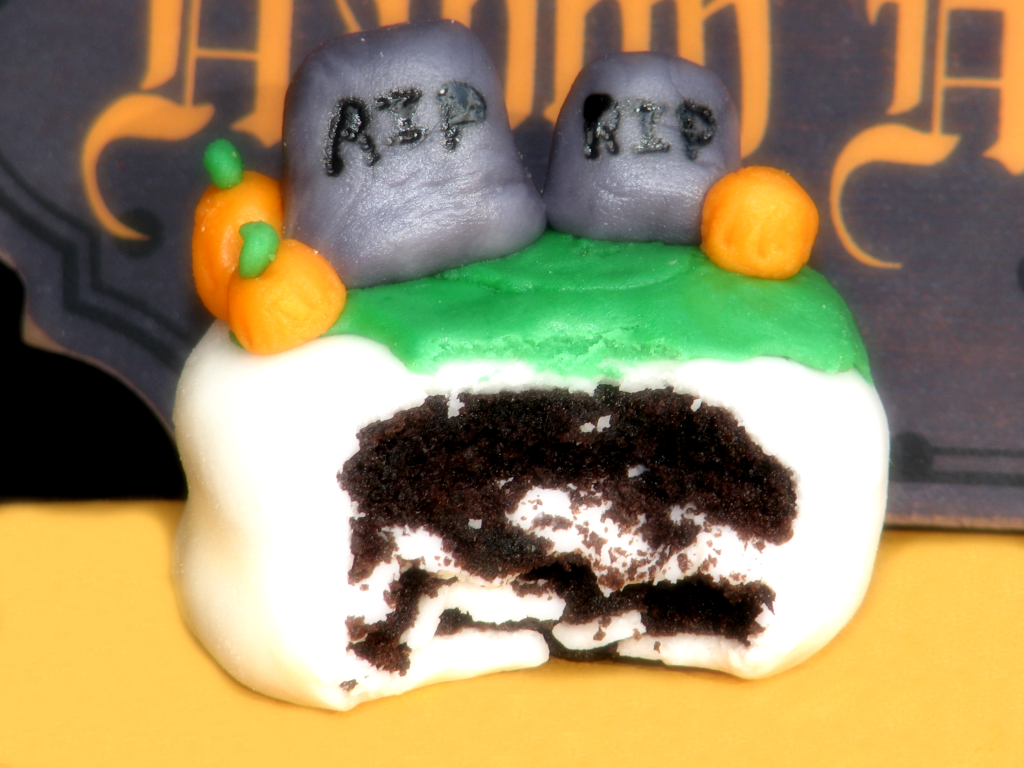
Once the fondant is colored, you can start to cover and decorate your OREO cakesters.

I covered my cakesters by using about a golf ball sized ball of fondant to cover each one.

Rolling my fondant out into somewhat of a circle with my fondant rolling pin. I then draped the fondant over the cakester and smoothed it down with my fingers. Smooth it all the way down so that the fondant is flush with the cake.

For the bottoms, I used a pizza cutter to cut away the excess fondant.

Carefully flip the fondant covered cakester over and smooth the edges onto the bottom, so that the whole cake is covered.

Now they are ready to decorate 🙂 You can also use the fondant to make fondant decorations.

This was a lot easier than I thought it was going to be, it’s just like playing with playdough!

(I used a little corn syrup mixed with water and a food safe paintbrush to stick my fondant decorations onto the cakes)

Or you could use edible markers to decorate them.

Side Note: Yes.. I know mine are not perfect, I am in no way any kind of great baker, but my family still loved them, and I loved them 🙂

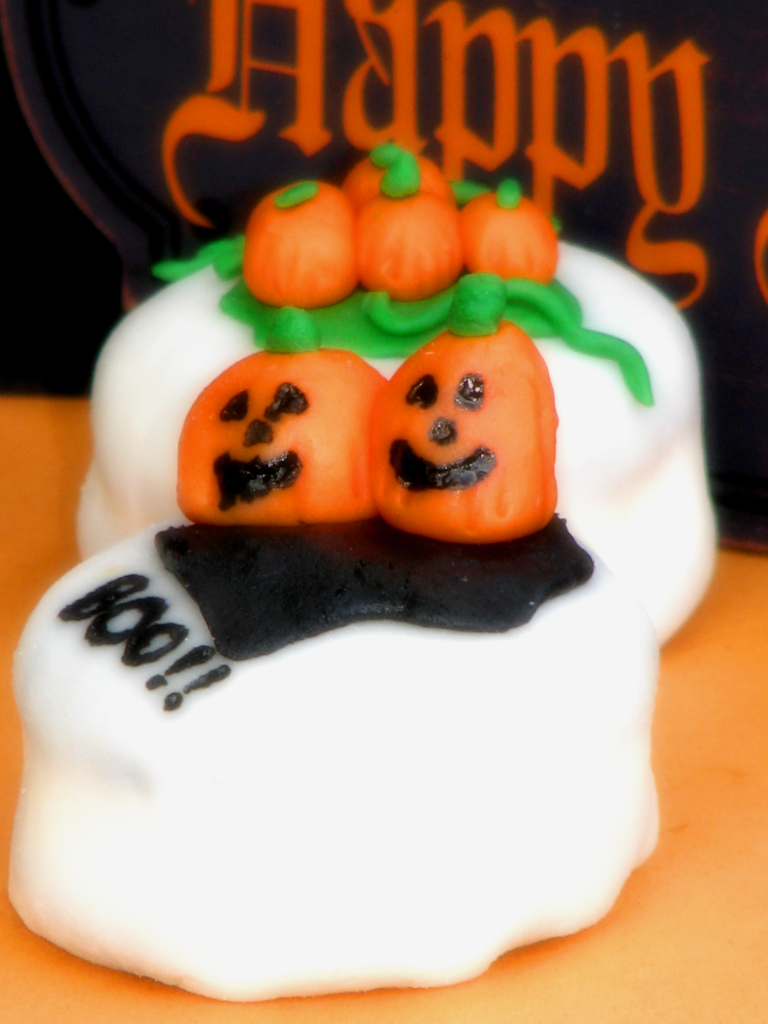
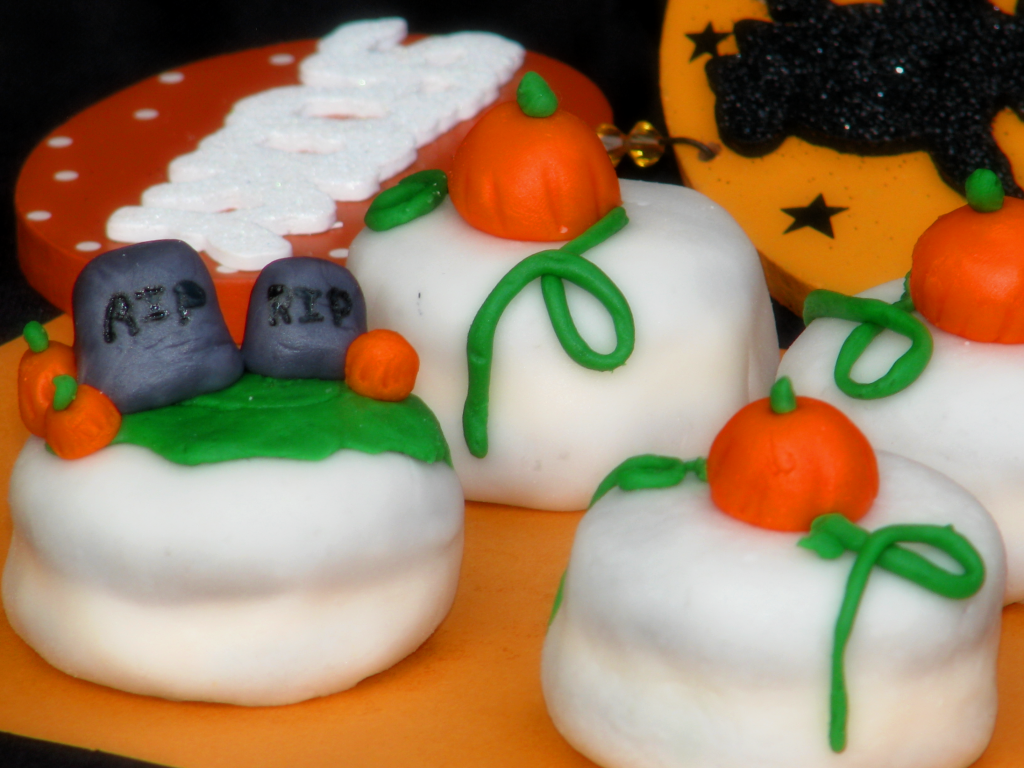
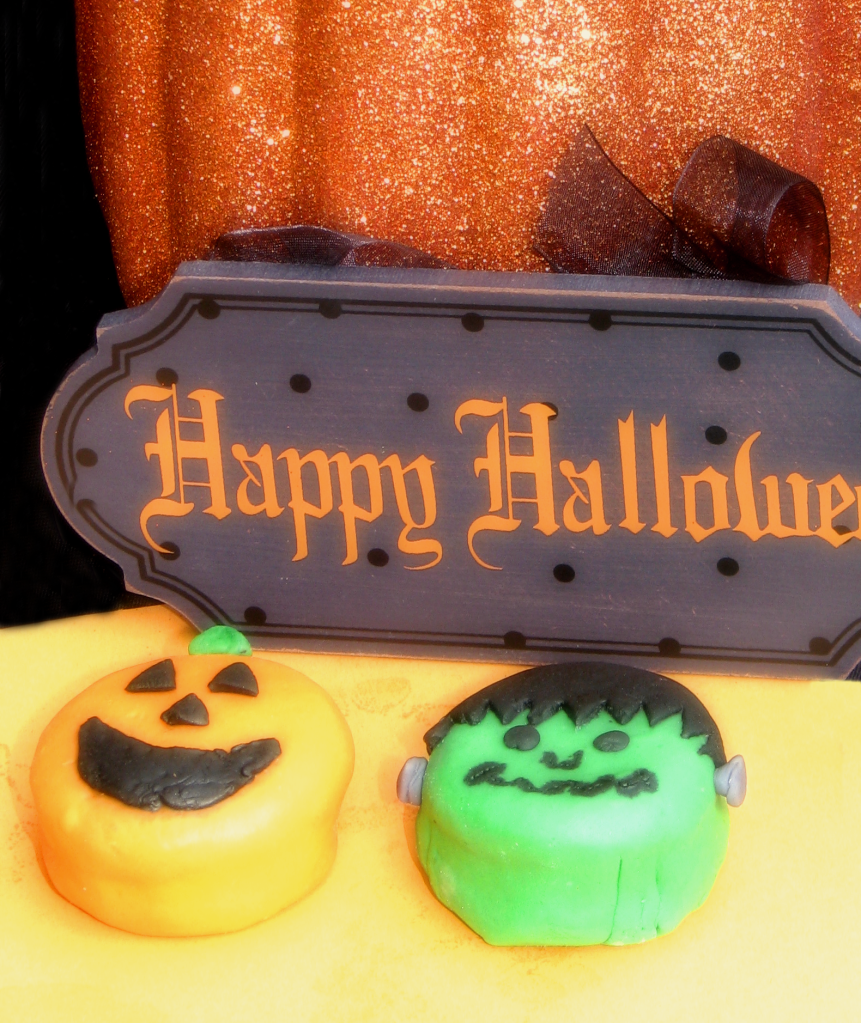
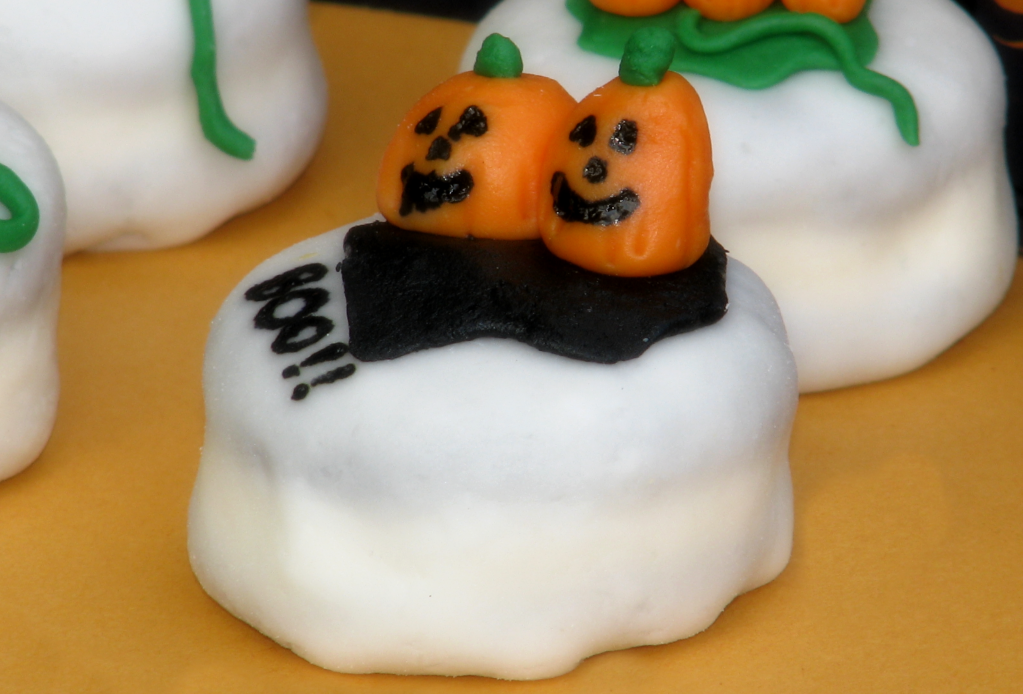
So these are some of the ones I did:

BOO!! Pumpkins
** I used a toothpick and black food coloring to write BOO!! and make the faces on the pumpkins**
Jack O’ Lantern and Frankenstein
Yummy!!
 HAPPY HALLOWEEN 🙂 (early haha)

Pin
Share
Tweet
177Shares
« Previous Post
Cream Cheese Swirl Brownie Dessert
Next Post »
Freschetta Proud to Support Pink Giveaway

Reader Interactions

Leave a Comment Cancel reply

Helpful comments include feedback on the post or changes you made.

Comments

  1. Crystal Barrett says

    October 13, 2013 at 4:47 pm

    These are so adorable! And I love Oreo cakesters! Have you tried the nilla ones!? I like those even better and they would probably be great if u didn’t want then so sweet! I would love to try and make these! Great job Angie

    Reply
  2. zin says

    October 4, 2014 at 7:51 pm

    They’re great! Thanks for sharing!

    Reply

Primary Sidebar

Meet Angie

I love the Farmer’s Market and Farm to Table meals but I’m also not ashamed to use canned vegetables and baking mixes. It’s all about balance! I’m so glad y’all are here!

More about Angie

Subscribe

Free Recipes, Free e-Books, and DIYs!

You have Successfully Subscribed!

Sign Up is FREE and you can unsubscribe at anytime.

Popular Posts

Instant Pot Short Ribs
Most Popular Recipes of 2017- We'll start from #10 and work our way all the way down to the #1 most popular recipe from 2017! These are the recipes that the most people visted over the year!  Starting at #10, these were the Top Recipes of 2017! Did you favorite make the list? 
Tape and Take Recipe

Copyright © 2009–2023 · Big Bear's Wife · Privacy Policy

Unauthorized use and/or duplication of this material without express and written permission from this blog’s author and/or owner is strictly prohibited.

DMCA.com Protection Status